One of the simplest ways to keep your cryptocurrencies safe from hackers and malicious actors is to store them off cryptocurrency exchanges and onto a cryptocurrency wallet. These wallets store your private keys offline so hackers cannot access your cryptocurrencies. In this section we review the most popular cryptocurrency wallets to help you decide which is the best wallet for you, and teach you how to set up and use your cryptocurrency wallet with our simple guides and tutorials.
The Trezor Model T is a cryptocurrency hardware wallet created by SatoshiLabs Group. Released in March 2018 with the latest firmware update in April 2023, the wallet features a new operating system tagged Trezor Core. This enables faster development of features and smooth coin support. This article is a guide on how to set up your Trezor Model T.
You can also set up your device with my step-by-step video below.
Check out our Trezor Model T Guide and review video!
Trezor Model T Packaging
This premium model costs 249 Euros (US$252). The Trezor Model T comes as a special kit, it contains the Trezor Model T device, magnetic dock, USB type C cable, stickers, user guide and recovery seed.
Trezor Model T kit
Trezor Model T Installation Guide
Installation is smooth with the aid of the user guide. Their website also has a web assistant to guide you through the installation steps.
Notably, you have to be careful in the entire process to avoid leaking your private keys and recovery phrase. Leaking your private keys or recovery phrase opens you to serious risk by hackers to steal your coins.
For complete security, ensure the area where you are setting up your Trezor Model T is completely camera free including sealing your computer’s webcam.
The Model T device comes with a hologram seal that you have to peel off to plug in to your PC.
If you don’t see this seal or it looks different to the one pictured, do NOT proceed with the set up and contact Trezor support immediately.
Hologram seal on the Trezor Model T
Connect the Trezor Model T and your computer using the USB type C cable provided.
Download and Install the Latest Firmware
The next step is to download and install the latest firmware.
Download the latest firmware from the Trezor website. Do not disconnect your device during this process!The Trezor will restart after installation. On the website, click “Check for devices” and connect to the “Unknown device from InterBiometrics”- this is actually your Trezor.
Afterwards select the option “Create a new wallet”. This will be proof that the wallet is unused.
Select “Create a new wallet” if you are using the Trezor for the first time. Some ebay sellers will ask you to restore your wallet, those are scams!
Create a Backup of Your Trezor Model T
The penultimate step is to create a back up. The wallet generates recovery words which are in a specific order. Write down those words in the same order on the piece of paper provided with your Trezor Model T.
This is known as your recovery seed.
Remember to create a backup of your Trezor so you can recover your funds even if you lose your physical device.The recovery seed will be generated on your Trezor device.Write down your recovery seed on the paper provided with the Trezor and keep it safe. Do not take a photo of it, upload it onto your computer or online.
IMPORTANT: do not take a photo of your recovery seed, or upload it onto your computer or online.
This is because you use your recovery seed to restore your funds on another Trezor if you lose your phyiscal device. Conversely, this means that any thief can do the same if they obtain your recovery seed.
Create a New PIN Code
Lastly, set a 4 to 50-digit PIN code which you will use to unlock your Trezor every time before using it.
The PIN is set on your Trezor Model T device. This is so that even if someone obtains your Trezor, they cannot unlock and use it unless they have your PIN code.
This concludes the set-up process, meaning you’re good to go. It goes without saying that at all times, be extra vigilant to ensure you don’t expose your keys or recovery seed. This is to ensure your wallet is secure.
Using the Trezor Model T
The wallet offers a range of coin options for trading. They include; Dash, Bitcoin, Bitcoin Cash, Bitcoin Gold, etc.
The options are listed out on the interface once you connect your Trezor to your computer.
Trezor Model T is a second generation cryptocurrency hardware wallet manufactured by Satoshi Labs. The Bitcoin and Altcoin wallets operate using a new firmware called the TREZOR Core, allowing faster development of new features.
BUY YOUR TREZOR MODEL T NOW!
Trezor Model T
In this review, we will be looking at the features of the hardware wallet, the cryptocurrencies it support, and if it is worth buying or not.
If you want to learn how to set-up and install your Trezor Model T, check out our complete Setup Guide here.
Or check out my video review below.
Key Features of the Trezor Model T
Screen: Bright color LCD – 240×240 pixels;
Connectivity: USB-C connector for connecting to the computer or mobile phone;
Mobile support: Android support via the Trezor Manager; and
External wallet compatibility: supports MyEtherWallet and a few others.
Inside the box
Security Features
Passwords on the device are individually locked with the Trezor Password Manager using a user’s digital keys. The device can also function as a U2F hardware token, which allows Trezor to utilize the screen and inform a user about any authentication request before they approve it.
Trezor created the standard recovery seeds (BIP32/39/44), which enables users to recover their entire wallet easily with the help of their 12-word recovery seed.
Similar to the Trezor One, the Model T has a passphrase feature so users can generate a new wallet. To access passphrase protected wallets, users will be required to enter your passphrase in addition to your security PIN.
So say a thief demands you to give them access to your device. You can give them your PIN code to access a wallet with fewer funds. Meanwhile the bulk of your crypto assets are stored safely behind passphrase protected wallets.
Can the Trezor be hacked?
Kraken Security Labs announced they devised a new way to hack into Trezor devices within 15 minutes of physically having the device. They did this through voltage glitching using a device and cracking the PIN code using a custom Python script, which will reveal the recovery seed. According to Kraken Security Labs, the attack makes use of inherent flaws within the Trezor’s microcontroller. So it will be difficult for Trezor to fix this vulnerability without redesigning the hardware and putting out a new device.
In reply, Trezor noted that the attack cannot work remotely and if users turn on the passphrase feature on the device. Trezor also reassured users that physical access is only a threat to 6-9% of cryptocurrency users.
Trezor Model T 2.3.0 firmware update- does it fix the Kraken Security Labs hack?
In mid-April 2020 the Trezor Model T announced their latest firmware update to ver. 2.3.0 which features some updates on their security measures. Before we answer whether it can resolve the 15-minute hack devised by Kraken Security Labs earlier this year (see above section), let’s take a look at what these features are.
The new updates include 2 passphrase updates which firstly, allow temporary passphrase caching so you can switch between your various passphrase protected wallets when using the device. The passphrase cache is only temporary, so once you disconnect the device, nothing is saved. Secondly, users will now be asked to choose how to enter their passphrase on the device itself, rather than on your computer or phone.
A notable new features is the wipe code which acts as a “self-destruct PIN”. When entered either on the device itself or your computer or phone, the wipe code erases all private data from your Trezor and resets the device to the factory defaults. Trezor suggests users can write the wipe code somewhere near your device as a decoy PIN, so if a thief tries to unlock your device, they will make the Trezor erase itself.
The SD card protection feature is intended to serve as an additional protection against physical attacks on the Trezor Model T. When this feature is enabled, a randomly generated “secret” is stored onto the microSD that is inserted into your Trezor. This “secret” carries no information on your Trezor’s seed or passphrase and is a completely random value. With the feature, you would need to insert the SD card into the Trezor so as to combine the “secret” with the PIN and decrypt the data stored on the Trezor. Hence you will require both the SD card and the Trezor to unlock it and access your cryptocurrencies. So you can enable this feature and keep the SD card and your Trezor in separate locations if you are worried about physical attacks.
From our research, Trezor has not directly responded whether their latest security firmware update fixes the hack devised by Kraken Security Labs. As mentioned previously, the vulnerability identified by Kraken cannot be resolved unless the hardware is redesigned. So the latest firmware updates can only indirectly give hackers have a harder time accessing your device but not resolve the core vulnerability. The fact that it only took Kraken 15 minutes of physical access to the device to hack it, and their suggestion that the glitching tool could be mass produced for sale at around USD$75 continues to be extremely worrying. For this reason, whilst we appreciate Satoshi Lab’s efforts to continue improving the device we cannot reinstate the security score given to the Trezor prior to the Kraken hack being discovered.
Security 3/5
Multi-Currency Support
Trezor Model T is designed to handle over a thousand cryptocurrencies including popular ones like Bitcoin, Ethereum, Litecoin, Dash, Bitcoin Cash, Bitcoin Gold, and more. Regular updates enhances features and allows for even more supported cryptocurrencies. One advantage of the Trezor over other wallets is that all currencies are accessible without the need to “install” individual applications – this simplifies the overall use of the device
Currently, the Trezor is supported by decentralized exchanges such as Binance DEX, IDEX or Switcheo exchanges.
Multi-currency support 3/5
3rd Party Wallet Support
Exodus Wallet offers Trezor support, allowing for Exchange features
3rd party wallets like Exodus Wallet and others (MetaMask, etc.) offer Trezor support and allow for access to the hardware wallet inside of Exodus. This means users will be able to choose between different wallet interfaces and enjoy unique features offered only by Exodus, such as direct exchange of currencies.
Hardware Design
The device is relatively compact at 2.52in x 1.54in x 0.39in (64mm x 39mm x 10mm) and weighs 0.77 oz (22 grams).
It also has an LCD size of 240 x 240 pixels.
With the LCD screen, users can edit and configure the wallet according to their taste.
The sleek design makes it an upgrade to the previous Model One. Instead of buttons, the device has a touch screen available for ease of use.
However, I find the touch screen is still small and can be hard to use. I eventually settled on pressing the screen with my pinky finger.
Thumb for scale
The device works with a broad range of operating systems. Thus, users won’t have the problem of connecting it with Windows, Linux, MacOS. They also have Chrome extensions available for those who wish to use it. The user interface gives users the option to change the language and view transactions via the touch screen.
Hardware design 5/5
Ease of use 4/5
Mobility
The device supports Android mobile and laptop devices. There is currently no support for iOS.
Users will need to download the Trezor Manager from the Google Play Store, which enables them to manage the wallet from their mobile phones. The mobile app can be used in sending cryptocurrencies, generating addresses, and viewing the details of a user account.
It also supports integration with Bitstamp and Bitex exchanges. So users can sign in and send cryptocurrencies to these exchanges directly using the Trezor device.
Is Trezor Model T worth it in 2023?
At the official price of US$219 (NOW ONLY $186 UNTIL 21 MAY!), it is an excellent cryptocurrency hardware wallet.
However, some people may consider the price too high despite its functions and high-security level. It is quite an investment if you are new to cryptocurrencies or only trade cryptocurrencies casually.
The touch screen, its support of over a thousand cryptocurrencies, and its high-security features are some of the reasons that could convince people to purchase this crypto hardware wallet.
Verdict
Trezor Model T
Deciding whether or not to purchase the Trezor Model T over other available cryptocurrency hardware wallets has a lot to do with what features you are looking for.
The wallet supports over a thousand cryptocurrencies. Thus, virtually half of the cryptos available in the market can be stored on the device.
Its integration with exchanges such as Bitstamp, Coinmap, and Bitex also makes it a good choice.
However, one significant downside is that the device does not support IDEX or Switcheo exchanges. The latest findings from Kraken Security Labs on physical hacks on the device are also extremely concerning.
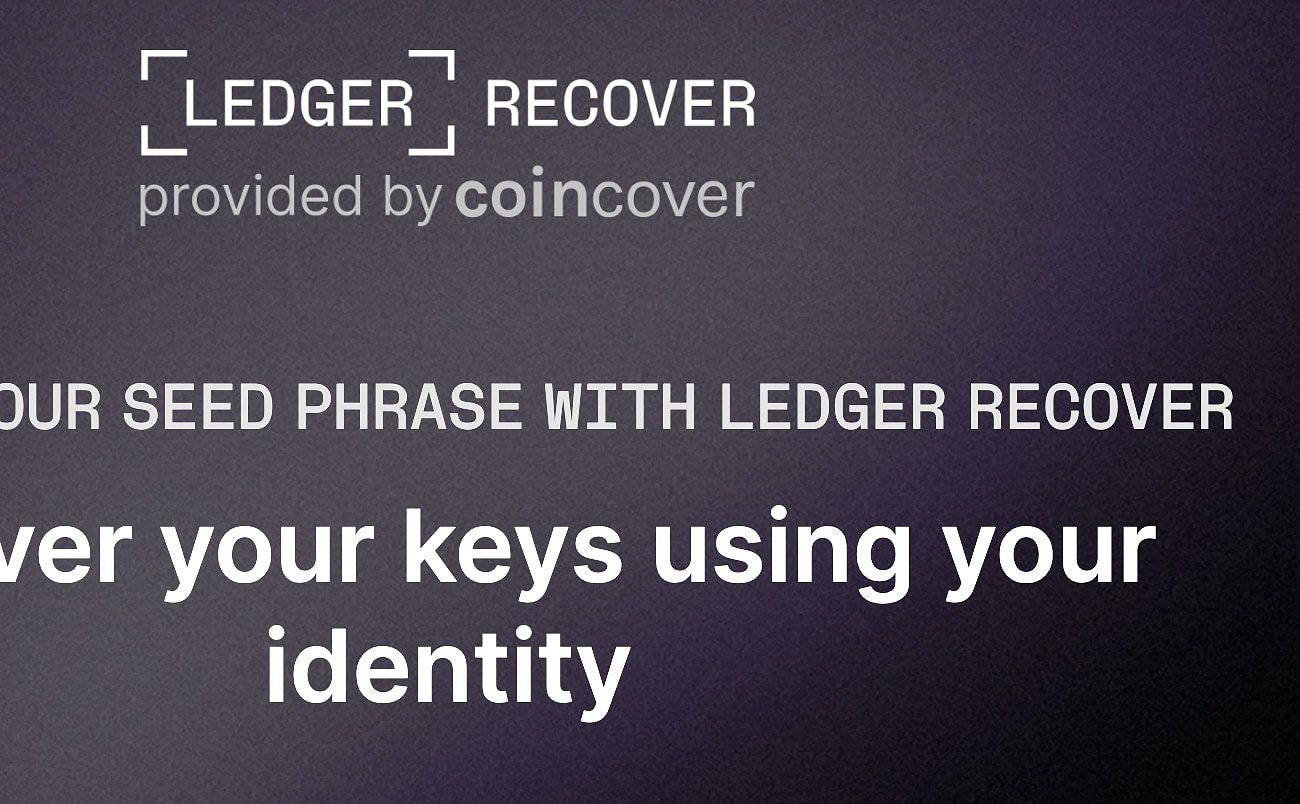
Ledger, the company behind the Ledger Nano X and Nano S Plus cryptocurrency hardware wallets has just announced its new product called Ledger Recover. Ledger Recover is an ID-based key recovery service that provides a backup for your Secret Recovery Phrase. If you lose or don’t have access to your Secret Recovery Phrase, the service allows you to securely restore your private keys using a Ledger device.
Ledger Recover is an ID-based key recovery service that provides a backup for your Secret Recovery Phrase. The Secret Recovery Phrase is a 24-word phrase that is used to restore your private keys if you lose access to your Ledger device. With Ledger Recover, if you lose or don’t have access to your Secret Recovery Phrase, the service allows you to securely restore your private keys using a Ledger device.
How to use Ledger Recover?
The process of using Ledger Recover involves several steps. First, your identity is verified using your ID document and a selfie recording. Next, your Ledger Nano X duplicates your Secret Recovery Phrase and encrypts the duplicate. This encrypted duplicate serves as the backup for your Secret Recovery Phrase. The system then links the backup to your verified identity and fragments it into three pieces. Ledger, Coincover, and a third provider independently secure each of the encrypted fragments.
Accessing your wallet with Ledger Recover is seamless: all you need is your ID and your current Ledger Nano X or a new one. You alone can start the recovery process, which is ensured using double ID verification. The service relies on companies with industry-leading encryption and ID verification technology to provide a secure and reliable service.
Who is the Ledger Recover good for?
Ledger says the Ledger Recover is good for those who are new to cryptocurrency and may find it difficult to back up and keep their Secret Recovery Phrase safe. It is also good for those who would like another backup of their Recovery Phrase in another location.
Will the Ledger Recover be available on all Devices?
At present, Ledger Recover only works with the Nano X. Soon, it will also work with the Nano S Plus and Ledger Stax. However, it is not compatible with the Nano S.
Do I have to use Ledger Recover?
No, Ledger Recover is a completely optional service that you must choose to use. To choose to use the service you must subscribe with 2 different partners and create accounts with them. After you sign up, Ledger initiates the cryptographic process and asks you to confirm your agreement to it on your Ledger device.
Is Ledger Recover free?
No, it is a subscription service that will cost $10 per month. To use the service, you must also complete a KYC process with an ID document and a selfie recording.
If you don’t pay the subscription within 7 days, you can’t restore your private keys using Ledger Recover. If you don’t resolve your payment within 3 months, your subscription will be suspended. After suspension, you have 9 months to reactivate your subscription by contacting Ledger Recover Support and paying a 50 EUR fee and any outstanding balance.
How does Ledger Recover Work?
Ledger Recover works through 3 companies: Ledger, Coincover and a third company. You will need to opt-in to use the service. When you opt in for the service, you will be prompted to confirm if you want to use it. If you agree, you will need to sign a transaction on your Ledger device. Afterwards, the system splits your private keys into 3 parts, encrypts them on the device, and sends them through a secure channel to 3rd party providers. The providers will encrypt the parts again before storing them.
If you need to recover your private key, you will have to go through a thorough ID verification process. This is to confirm your identity. Once your identity is verified, the providers will send the encrypted parts of your private key directly to your Ledger device. Your device will then decrypt the parts and you will be able to access your private key again.
Who keeps your private key when you use Ledger Recover?
3 separate companies in 3 countries will store your private key if you subscribe to the service. The companies are Ledger, Coincover and Escrowtech. In particular, Coincover already works with several B2B offerings and also provides a $50k insurance plan. Additionally, two ID verification providers participate in the process.
Is Ledger Recover Safe?
According to Ledger, Ledger devices do not have any backdoors. The Secure Element chip and a paper backup securely store your seed phrase. If you opt to use the service, it creates an additional backup. This is done by splitting your private key into 3 encrypted parts and storing them with 3 different parties.
Ledger also offers an added layer of protection where, subject to investigation, US$50,000 compensation may be available from Coincover in the unlikely event that something goes wrong.
Conclusion
In summary, Ledger Recover is an optional ID-based key recovery service that provides a backup for your Secret Recovery Phrase. It splits your private key into 3 encrypted parts and stores them with 3 different parties. The service is not free and requires a subscription fee of $10 per month. If you’re new to cryptocurrency or would like an additional backup of your Recovery Phrase, Ledger Recover may be a good option for you.
Ledger released a new hardware wallet – the Ledger Nano X. This new device protects your cryptocurrencies with military-grade protection and prevents digital theft and hackers. These are the key new features of the Ledger Nano X:
Large HD screen – Displays address of receiver in full without scrolling
More storage space – Install up to 100 different apps for different coins.
Rechargable Battery – allows the device to be powered-on without a cable.
Ledger Recover – A new (albeit controversial) seed phrase recovery subscription service. Learn more here.
Click below to buy!
This guide will help you setup your Ledger Nano X and teach you the important features. In addition, we the most important question: Is Bluetooth Safe?
Cryptocurrency can be spent on the go with Ledger Nano X
One of the biggest features of the Ledger Nano X is the support for mobile phones (both Android and iPhone). The new Ledger Live app allows for both sending and receiving of all supported cryptocurrencies on the go.
The app connects directly to the Nano X via Bluetooth, so no cable is required. The device has a battery that allows it to be actively powered on for more than 8 hours (depending on use), so the Nano X can be brought out to send cryptocurrency on the go.
Portfolio mode allowsLedger Liveto display all available balances that is stored on the Ledger Nano X. This is accessible even if the hardware wallet is not present, so you can conveniently browse the portfolio. To send cryptocurrencies, the device must be present to sign the transaction via Bluetooth. It is important to remember that the private key to sign transactions never leaves the device or is transmitted via Bluetooth – only the signed transaction which cannot be altered (secure).
Ledger Mobile app showing the Ethereum address with verification from Ledger Nano X
Ledger Live Mobile also supports the installation of various apps for different cryptocurrencies via Ledger Manager, just like the desktop version. The mobile app boasts the same functionality as the desktop version with the notable exception that it does not yet allow firmware updates.
How to Add or Remove Apps on the Ledger Nano X
To use different cryptocurrencies on the Ledger Nano X, the app for that coin needs to be installed on the Ledger first. This is done via the Ledger Live app on either Windows, MacOS, Linux, Android or iOS. First install Ledger Live, connect the Nano X and enter the “Manager” interface. The app will require you to unlock the Ledger by entering your pin and entering the home screen. You will need to authorize Ledger Live by confirming “Allow Ledger Manager”. Once you are connected, you will see a list of different apps that are ready to be installed (if your list is shorter than in the following image, update the firmware of the Ledger Nano X).
Use Ledger Live to install new apps on the Nano X
Is Bluetooth Safe?
The simple answer is: Yes. One of the initial concerns (reddit) about the Ledger Nano X is communication via Bluetooth, a form of radio communication. The previous model (Ledger Nano S) only had cable connectivity, which would not expose the device to nearby attackers. Bluetooth is safe to use in this case because the device is never controlled via Bluetooth – instead it is only used to send unsigned and signed transactions. This means the private key (the key to all the funds) is not exposed and does not leave the device.
The Nano X operates with the assumption that the Bluetooth connection (which is a bearer, exactly like USB) is compromised. The addition of BLE doesn’t impact the security model. Transactions must always be physically verified on device by pressing both buttons. Moreover, on the Nano X screens and buttons are directly connected to the Secure Element (single chip architecture), which is also an enhancement of the general security design. (Valium)
On top of this, the Ledger Nano X functions assuming the Bluetooth is in “compromised” mode. This means it will never give any control to other external devices and communication is limited to transaction signing only.
Control Panel on Ledger Nano X allow Bluetooth to be turned On / Off
Keep your Recovery Phrase Safe!
There will be a sheet where you can write down your 24-word recovery phrase. This is the most important part because it acts as a backup to the device. You will need to keep it very safe because if someone gets access to that paper it is essentially the same as stealing your wallet.
Do not take a photo or have a digital copy of that list!
Write down your 24-word recovery phrase. The order of the words is also important.
After setting up the device, with it still plugged in, visit the Ledger Live website and download the app you want to use.
Follow the instructions on the site and use.
Note: after setting it up you will be navigating the device on your computer.
You can receive cryptocurrency even when the device is offline. It’s only when you want to send that you need to connect the device and enter your PIN and login.
After inputting all the transaction details on your computer, as an additional security measure, you can double check the details on the device. Make sure the address and amount are correct and confirm.
Why use a Hardware Wallet?
With traditional currencies, you, the user, are the most important person. If you have ever lost your bank card, you can always go to the bank with some sort of identification and request for access back to your account.
Cryptocurrencies, however, don’t care about the physical person but rather the private key associated with the wallet. The private key is used to verify the account and transactions. Anyone who has access to this key can send funds and that is why you must keep it safe. Another thing is that cryptocurrency transactions cannot be reversed.
Hardware wallets can protect you against these things. They add an extra layer of security by storing the private key on the device itself. The only way to hack it would be to have physical access to the hardware wallet or with the backup phrase.
Paper wallets offer arguably even more security. However, the process for setting them up and using it is very complicated. Hardware wallets strike a nice balance between security and convenience.
Is the Ledger Nano X Worth the Upgrade?
At a higher price point, many users are asking the question “Is the Ledger Nano X worth the Upgrade“. For us, the answer is depends.
If you use more than 3 apps, then consider upgrading. Coming with a much larger memory space, Nano X is able to store a lot more applications than the soon-to-be-retired Ledger Nano S. However, its updated model, the Nano S Plus, at a price of USD 79, is capable of storing up to 100 apps, making it much more competitive with the pricier Nano X. As of writing, the Ledger Nano S is only able to store 2-3 applications with Firmware 1.5.5 (such as Bitcoin and Ethereum app). Whilst you can get around this limitation by uninstalling unused apps, the constant switching often leads to confusion and time wasting.
If you need to send large amounts of Cryptocurrencies on the go. With Bluetooth support, the new Ledger can be used with Android phones and iPhones.
If more apps and mobility are not a big concern for you, stick with the Ledger Nano S or Nano S Plus.
Successfully set up your Ledger Nano X? Now it’s time to get started with trading Bitcoin and other cryptocurrencies! Check out my course created in collaboration with Jeff Kirdeikis of Uptrennd- Bitcademy: Learn, Invest & Trade Bitcoin – In Under an Hour
Ledger Nano X is the next generation of Hardware wallet with smartphone support, a larger screen and more storage space for Apps. Retailing for $119, the Ledger Nano X is great for newcomers or experienced traders trading more than 3 types of cryptocurrencies at at time or large volumes on the go. If more apps and mobility isn’t a big concern, stick with the Ledger Nano S.
In this review, we’ll be looking at the security, hardware design and cryptocurrency support of the Ledger Nano X to tell you if this device is worth purchasing or not. For Set-up and installation guides, check out our full Ledger Nano X guide.
CLICK BELOW TO BUY!
Key Features of the Ledger Nano X:
Ledger Nano X Video Review
Larger screen – Displays full cryptocurrency addresses without scrolling
More storage space – Install up to 100 different apps for different coins.
Rechargeable Battery – allows the device to be powered-on without a cable.
Ledger Recover – A new (albeit controversial) seed phrase recovery subscription service. Learn more here.
Latest features: stake, swap, earn and lend cryptocurrencies
Staking and earning
Ledger Live allows for staking Tezos ($XTZ), Tron ($TRX), Cosmos ($ATOM) and Algorand ($ALGO). Users can lock up these cryptocurrencies to secure their respective networks and in return they will be paid interest for doing so. This feature expands Ledger into more than just a secure place to store your cryptocurrency, it can even help you grow your digital assets.
Staking your digital assets can be done in 3 simple steps. First, freeze your assets by logging onto your Ledger Live, choosing the relevant account for the asset you wish to stake and click “earn rewards”. A popup window will then appear. There you will be allowed to select the amount in your wallet you wish to freeze. Secondly, vote for your validator(s) who will be making the blocks on your network and the cryptocurrency earned by making these blocks will be redistributed to voters. Lastly, claim your rewards by clicking “Claim” in your relevant account. Rewards are claimable every 24 hours.
Swapping
Ledger has released a Ledger Swap feature which allows users to exchange their cryptocurrencies through their partner Changelly. How this works is you send your cryptocurrency from your device to Changelly, and Changelly sends you back the swapped cryptocurrencies.
To use this feature you will need: Ledger device, Ledger Live, the app for the crypto you want to swap and receive, and finally the exchange app.
Lending
Ledger is working with Compound ($COMP) to allow users to lend DAI, USDT and USDC through Compound’s decentralised finance (DeFi) protocol. The purpose of doing is is that the lender could earn an Annual Percentage Rate.
Further, there are numerous benefits when using Ledger to lend:
Control: You have control and proof that the crypto you lend and generated interest belong to you. This is because lending on Ledger is done through Compound, and when you lend on the platform you get “cTokens” in return. These cTokens represent proof of your ownership of the cryptocurrencies lent and the interest generated. These cTokens are stored by you until you want your lent assets and interest back, and in which case all you need to do is to send the cTokens back to the smart contract.
Security: cTokens are stored on your ledger hardware wallets.
Convenience: Compound’s lending features are available directly through Ledger Live.
Lending crypto using Compound and Ledger Live is done in 3 simple steps. Firstly, on Ledger Live’s Manager, install the application for the cryptocurrency you want to lend and create an account. Secondly, enable your account to authorise Compound’s smart contract to interact with your account. Finally, select the amount of cryptocurrencies you want to lend and issue a transaction to Compound, verify and approve the transaction on your device.
Security features
One of the key reasons to buy Ledger hardware wallets is the firm’s reputation for security. The Nano X contains a two processor chips:
Secure Element: ST33J2M0 (secure) is independently certified and stores the private key and signs transactions
Operating system: STM32WB55 chip is responsible for Ledger’s BOLOS proprietary Operating System.
Secure elements are separate pieces of hardware (second layer of security) with their own storage and limited functionality that cannot be breached by hackers. This means that even if the Ledger Nano X is connected to a compromise device – like a hacked laptop or phone, the private keys (=access to crypto funds) is never compromised. Devices like the Trezor One and Model Tdo not have secure elements and only have a single layer of security.
Ledger Nano X Teardown showing CC EAL 5+ Secure Element Chip
The Ledger Nano X also has the same BOLOS operating system that is found on the Nano S. BOLOS ensures that addresses are displayed properly on the device and handles connections to external devices.
Similar to the Nano S, users can set up wallets protected by a passphrase in addition to your primary PIN code. So say a thief demands you to unlock your device, you can give them the PIN code to access wallets with fewer funds. Whilst hiding the bulk of your crypto assets behind passphrase protected wallets.
The Nano X has the addition of Bluetooth support. Unfortunately Bluetooth’s security record is not spotless, and presents a new vector of attack for the device. Ledger CTO Nicolas Bacca has stated during an interview that Bluetooth on Ledger functions assuming the connection has been compromised – at no point will it be able to take over the device.
Bluetooth can be turned off on the Ledger Nano X
In October 2019, the Nano X received CSPN (First Level Security Certificate) certification issued by the ANSSI (National Agency for Information Systems Security). Currently, of all the cryptocurrency hardware wallets on the market, only Ledger’s Nano S and Nano X have this certification. The certification scheme evaluates multiple aspects of a device’s security including firewall, identification, authentication and embedded software by putting it through multiple attack scenarios.
Ledger hack
In July 2020, Ledger confirmed they suffered a data breach whereby an unauthorised third party accessed Ledger’s e-commerce and marketing database. As a result, around 1mil email addresses were exposed, and of those, 9,500 customers’ had further information exposed such as their first and last names, postal address, phone number and ordered products.
Ledger had reported the matter to authorities and are working with Orange Cyberdefense to investigate the matter. The team are also constantly monitoring for evidence of the data being sold on the internet.
Subsequent to the data breach, users have been reporting receiving phishing emails and texts by asking them to download a new version of the Ledger software. If users click on the link in the email, they will be redirected to a fake cloned version of the Ledger site. Afterwards, if users download the “update”, which is in fact a malware, it would ask users for their Ledger’s recovery phrase. The entered recovery phrase is then used by the attacker to recover the user’s wallet and send the user’s cryptocurrencies to the attacker’s wallet. For a full explainer on how the phishing attack works see the report from Kraken.
Phishing email sent from info@ledgersupport.io address
We do note that this can be more accurately characterised as a “data breach” rather than a hack. More importantly, this breach had no link or impact on the Ledger hardware wallets or the Ledger Live app. Cryptocurrencies stored on the Ledger devices have never been at risk.
Ledger has one of the most diverse support for different cryptocurrencies such as NEO, Vechain and Monero. With their open policy to development from project teams, the Ledger nano X supports 1100+ different assets. Many of these assets like Vechain or NEO are not found on competitors like the Trezor Model T or KeepKey, making Ledger the only hardware wallet available for many coins. The rule of thumb here is that the Nano X will support the same assets as the Ledger Nano S.
Installing Ledger Live
Ledger Live application interface
Ledger has a native application called Ledger Live to allow you to access cryptocurrency accounts (including Bitcoin, Litecoin Ethereum and other cryptocurrencies). Ledger Live is available on multiple platforms including Windows, MacOS, Linux, Android and iOS. We found the Ledger Live app easy to use as it clearly displays cryptocurrency assets with historical charts. Sending cryptocurrencies is extremely easy with step-by-step operation which clearly displays the sender and receiver addresses. There are also advanced features to manually customise the transaction fee in sat/byte.
How many coins can Ledger Nano X Hold?
One of the weakness of the Nano S is the lack of space for installed applications. The Ledger Nano X fixes this problem by increasing the internal memory to 2 MB. In our tests we were able to install all 73 available apps on the device (Ledger claims up to 100+). It should be noted that app storage is a convenience feature – apps will still retain their accounts / cryptocurrency balances even if uninstalled.
Does Ledger Nano X support Ethereum and ERC-20?
In September 2019 Ledger added a native Ethereum Wallet to its latest Ledger Live v.1.14.0 which adds support for 22 coins and over 1,250 ERC-20 tokens. This allows for direct access to tokens and ethereum whilst on the go without the need for a 3rd-party interface like MyEtherWallet. This is a welcomed upgrade to Nano X users who previously had to use different interfaces depending on the cryptocurrency you wanted to interact with. It will also certainly be welcome to newcomers to cryptocurrency, who may be confused by the different interfaces.
One of our complaints is that Ledger Nano X has to enter each app separately account – something that is not necessary on the Trezor Model T.
Is Ledger ready for Ethereum 2.0?
Ethereum 2.0 is coming soon with the first Phase 0 Beacon Chain to be launched in December 2020. Leading up to this, Ethereum stakers need to deposit at least 32 Ether onto the Beacon Chain using a deposit contract. Therefore Ledger has updated the Nano X’s new firmware version 1.2.4-5, in which the Ethereum application update to version 1.6.0 allows users to sign a deposit contract transaction directly on the Ledger Nano X. This feature is EXCLUSIVE to the Ledger Nano X.
In the future, users would be able to use their Ledger Nano X to derive an Ethereum 2.0 public key and validate that the withdrawal public key used in the deposit contract does actually belong to the Ledger device. The Ledger team are also working on a second Ethereum application which would allow stakers to securely sign blocks on the Beacon Chain.
5/5 Multi Currency Support
Hardware Design
Input is made with the two circular buttons
The new Ledger Nano X has two hardware buttons – hidden in the circular design of the cover pivot. These two buttons allows us to access menus (hold both buttons), make selections (press both buttons), and even input recovery phrases (use buttons to scroll). We found that entering PINs and recovery phrases to be tedious with only 2 buttons – perhaps a touchscreen or additional buttons could of helped.
Nano X has a larger screen with higher resolution. This means that full cryptocurrency addresses could be displaced without scrolling – something that was sorely lacking in the Nano S.
The Nano X uses a modern USB-C interface for charging and connecting to the PC. This is a welcomed upgrade as the computing world migrates to USB-C.
The Nano X also now comes in 3 colours: Onyx Black, Blazing Orange and Cosmic Purple.
Ledger Nano X can be used with mobile devices, and transactions can be sent on the go using the Ledger Live app on mobile. We found this feature to be very situational. Whilst it is helpful to be sending crypto on the go with the security the Nano X provides, the convenience is lacking when compared to mobile wallets like the Enjin Wallet. A separation confirmation set is needed: unlock device via PIN, enter the cryptocurrency app, check and confirm the transaction. This feels tedious and not suitable for simple coffee purchases or small transactions. What does make sense is perhaps large purchases (a car or house?) or token sale investments. However, the question remains, how frequently do we need to send large amounts of crypto on the go?
How do you Update the Ledger Nano X
Ledger periodically releases updates for the Ledger Nano X to improve security, functionality and coin support. In fact, firmware updates are required in order to get support for the latest cryptocurrencies. In order to update the firmware, plug the Nano X into your computer and run the Ledger Live app. The app will automatically display your version number and show any available firmware updates. To initiate the update, click the update button and confirm the installation in the Nano X by pressing down both buttons when prompted to “allow ledger manager” to access the device.
Ledger Nano X worth the upgrade?
At $119, the Ledger Nano X is not a budget device – it commands a certain price premium making the upgrade decision harder for many users. For many, the deal breaker convenience features – the large screen that displays full cryptocurrency addresses and larger storage for more apps. If these features are important for you, then the Nano X is worth the upgrade. However, if you only need a few apps, the budget friendly Ledger Nano S is a better option at $59.
Ledger Nano X compared with Trezor Model T
Ledger compared to other Hardware Wallets
The biggest difference between the Ledger Nano X and the Trezor Model T is the screen and supported coins. The Trezor Model T has nice touch screen which helps with entering PIN and the security phrases. However, the Trezor has fewer supported coins and usually projects tend to release Ledger support first. The following table is a comparison between various hardware wallets, including the release date, external security certification (if any), release date and our review rating.
At the end of the day, choosing between the Ledger Nano X and other hardware wallets is mostly based on 1 question – are the cryptocurrencies you want supported on the device. Support for a large number of coins has always been Ledger’s strong suit, along for browser support in Decentralized exchanges (Binance DEX, IDEX and Switcheo)
Can you keep your coins when upgrading from the Ledger Nano S to Ledger Nano X? Yes. When doing the upgrade, choose to “restore” option during setup and enter the 24 word recovery phrase from the Ledger Nano S backup
Can the Bluetooth Feature be turned Off in Ledger Nano X? Yes, Bluetooth can be disabled in the Control panel. This will disable Bluetooth communications and only allow the Ledger the communicate via the USB cable. You can access the panel by holding down both buttons for 3 seconds.
Can many apps can you install on the Ledger Nano X? We found that the Ledger Nano X can hold all 73 Apps currently available on the Ledger Manager. There is even more storage available for future applications.
Why does the Ledger Nano X Bitcoin Address change? Ledger includes a feature to automatically generate a new Bitcoin address each time an old one is used. This increases the privacy of transactions, as different addresses are used for new transactions. Old addresses can still be used as the Ledger contains full access (include future access) to these funds.
How do you generate a new public address for receiving funds New Public addresses are automatically generated when old ones are used (the address receives or sends a transaction).
What is the latest Ledger Firmware Currently the latest firmware is 1.6.0
Will the Coronavirus (COVID-19) pandemic affect Ledger? Ledger has issued a statement saying they have in place business continuity measures to ensure they continue to have inventory and products to ship to its customers. They are however experiencing some backlog in their customer service side but are working to ensure that customer’s concerns are answered. You can check the operational status of their systems here. Inevitably there may be issues with shipping products to customers, they are still able to ship to most countries though some customers may experience limited shipping options. Check here to see if shipping to your country may be affected.
Just got a new Ledger Nano X? or always been curious about getting started with Bitcoin and other cryptocurrencies? Check out my course created in collaboration with Jeff Kirdeikis of Uptrennd- Bitcademy: Learn, Invest & Trade Bitcoin – In Under an Hour
The increasing popularity and adoption of cryptocurrency has expanded the wallet market. Now that many well-known traditional and crypto brands accept crypto as a payment option, enthusiasts are constantly on the lookout for safer ways to store their digital assets.
Ledger is one of the most popular hardware crypto wallets in the sector. Since releasing the Nano S in 2016, Ledger has become a household name in the cryptocurrency space. To date, Ledger has launched three models of hardware crypto wallets, the Nano S, Nano X, and most recently, the Nano S Plus. The Ledger Nano S Plus retails for USD$79.
The Nano S Plus is Ledger’s third release from its Nano series, a line of pocket-sized hardware crypto wallets. Ledger’s Nano S Plus has all of the features of the original Nano S but with a few upgrades, including support for NFT storage and management. Additionally, the Nano S Plus has built-in support for interacting with various DeFi (decentralized finance) apps and services. (thetelegramnews.com) The wallet is an effective option for people looking to manage crypto, NFTs, and other decentralized services in one place.
New features of the Ledger Nano S Plus
Ledger introduced the Nano S Plus with an exciting list of features and improvements over the two previous releases. Some of the major new features on the Nano S Plus include:
Bigger display. Same display size of the Nano X but on a smaller device!
Expanded cryptoasset support. The Nano S Plus doesn’t just hold cryptocurrencies, but also NFTs and is the first Ledger device to have DeFi app integration.
Industry-leading security. The Nano S Plus uses the same industry-leading security with CC EAL5+ certification.
Easy setup. USB plug-and-play feature means owners can begin using the device in minutes.
Low cost. The Nano S Plus comes at an affordable price of US$79, making it an attractive option for all levels of crypto traders.
Security features: is the Nano S Plus safe?
The Nano S Plus uses the same certified secure chip (CC EAL5+ chips) as the Nano X to protect users’ assets. This chip employs state-of-the-art technology that guarantees high-level security and asset protection against phishing and other asset extraction schemes. Additionally, the wallet has industry-standard security features, including a security phrase, PIN code locks, transaction confirmations, password encryption, and more.
To learn more about the security features of the Nano S Plus and Nano X, click here.
5/5 Security Rating
Cryptoasset support
A major Nano S Plus feature is the huge roster of supported crypto assets and apps. The Nano S Plus supports over 5,500 assets and can accommodate up to 100 different apps. Some supported assets include:
Bitcoin (BTC)
Ethereum (ETH)
ERC-20 tokens
Dogecoin (DOGE)
XRP
BNB
Cardano (ADA)
Polygon (MATIC)
Litecoin (LTC)
Tron (TRX)
The Nano S Plus has 1.5MB of storage and with that can run over 100 apps simultaneously. On Ledger devices, an “app” refers to the app required to be installed to access a cryptocurrency on the device e.g. in order to access your BTC on the device you need to install the app on the Ledger first. Meaning that, unlike the Nano S which can only run 3 apps simultaneously, users are not required to delete apps in order to access other cryptocurrencies which do not have the apps already installed.
But what is truly unique about the Nano S Plus is that it is the first Ledger device to offer NFT support. Users of the Nano S Plus can securely hold, send, and receive NFTs via the Ledger Live app. Ledger has made this process user-friendly, as owners can authenticate transactions right from the wallet’s interface.
Users of the Nano S Plus can also access several DeFi applications through the Ledger Live user interface. Anyone can securely buy, exchange, lend or stake crypto assets.
The NFT support and DeFi app access give the Nano S Plus an even bigger boost in features compared to the Nano S and for that reason, we rank this category even higher than the Nano X.
4.8/5 cryptoasset support
Hardware design
Similar to the Nano S, the Nano S Plus also has two hardware buttons located on the top of the device.
The Nano S Plus has a much larger screen than its predecessor, which makes usage very easy. Same as the Nano X, the 128 x 64-pixel screen makes operating the device simple and helps users navigate the product’s features. The main benefit of the larger screen is that users can see the entire wallet address clearly displayed as one line on the screen. The screen also blends well into the rest of the device, adding to the Nano S Plus’ aesthetic appeal. And whilst the screen size on the Nano S Plus is the same as the Nano X, the Nano S Plus is a much smaller device overall.
The Ledger Nano S Plus’ measurements are smaller than the Nano X at 62.39 x 17.40 x 8.24 mm, and weighs in at only 21g. The wallet is about the size and weight of an average USB flash drive and is easy to carry around.
4.5/5 for hardware design
4.5/5 for ease of use
What’s in the Ledger Nano S Plus Box?
The Nano S Plus wallet comes with the following inside the box:
The Ledger Nano S Plus hardware
A Type-C USB cable to connect the Ledger to a computer
An orange box with three notepads for the Secret Recovery Phrase
A purple box with the manual instructions
A key-holder chain with a Ledger logo
Final Verdict
The Ledger Nano S Plus is a great option for enthusiasts looking for a secure, reliable, and easy-to-use hardware wallet. It offers the same features as the original Ledger Nano S and adds a lot more. Furthermore, users looking to upgrade from the older Ledger Nano S can quickly move their assets to the newer S Plus.
The Ledger Nano S Plus is one of the best hardware wallet options on the market for crypto and NFT enthusiasts who currently own or plan to purchase NFTs or get involved with any DeFi project.
The first line of defense to an online account is a username and a password. However, malicious actors sprawling the internet have made the traditional account security combo unreliable and risky per se.
Therefore, SMS-based two-factor authentication (2FA) has been heavily utilized to provide another layer of security. Unfortunately, skilled hackers can still find a way to intercept SMS codes.
To detach account security from the monopoly of software-focused methods, universal second-factor (U2F) authentication was developed. The technology uses open standards under the Fast Identity Online (FIDO) Alliance.
Check out our video explaining what is YubiKey, and its pros and cons.
YUBIKEY REVIEW AND GUIDE: How to keep your Bitcoin and cryptocurrency SAFE
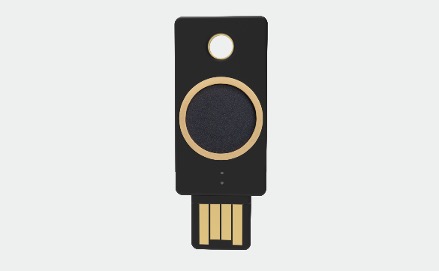
What is YubiKey?
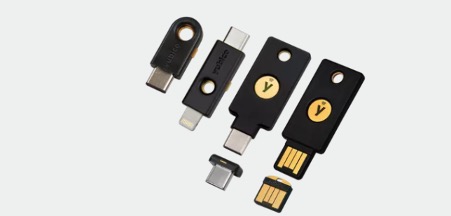
FIDO works to reduce the reliance on passwords when securing internet accounts. YubiKey is a U2F-enabled hardware key developed by Yubico to secure web-based services. Businesses, individuals, and developers can use it.
YubiKey
The key is available in different shapes and connectivity functionalities. While earlier versions only support physical insertions into USB ports on a host device, the YubiKey five series accommodates connection through near field communication (NFC).
NFC allows interaction with the device without physically plugging it into a port. However, the key and the host device must be near each other.
YubiKey Reviews on Amazon
From the reviews left by buyers on Amazon and other platforms, it is evident that the key is a must-have for security-conscious internet users. In fact, over 80% of buyers left a five star score for the YubiKey.
One of the reviewers recommended the Yubico YubiKey to developers, IT pros, and “security-minded users.” Furthermore, they praised its manufacturer for providing GUI-enabled YubiKey manager for those having a hard time on where to start.
Others attributed their happiness to the key’s support for password managers such as LastPass. YubiKey users hail it for ease of use as a smart card and its compliance to the Health Insurance Portability and Accountability Act (HIPAA).
Unfortunately, not everyone is happy with their hardware key. Although the negative reviews are minimal, some raise valid concerns.
Among the main problems is documentation, which isn’t user-friendly. Additionally, a buyer on Amazon notes that the key “is still too complicated for the average consumer, as it’s not exactly a plug and play device.”
How to Start Using YubiKey
The process of enjoying world-class security on your online accounts starts with purchasing the hardware piece from a reliable platform. After receiving a key, visit Yubico’s website, and choose your key from the list.
Specifying the purchase key from the list helps filter the services where it can be used to provide security. On the services list, select the account you need YubiKey’s hand in boosting its security.
Each service is followed by step-by-step instructions on how to connect to the hardware security key.
For example Binance lets you use your YubiKey with their cryptocurrency exchange. This means that your YubiKey is required for authentication before approving any transactions. Note however that Yubikey authentication is not supported on Binance’s Apps and mobile websites.
How to set up your YubiKey on Binance
Login to your Binance account and click on your profile avatar.
Choose “Security” from the options, then “Setup.” On the 2FA section, click on “Security Key.” Note that it only provides the needed extra security layer when accessing the Binance.com website.
Read the note and hit “Continue anyway.”
Insert the key in any available USB port and press the button at the hardware’s center to activate it.
Activation needs to be done within one minute after inserting the key. However, it can be repeated if you miss this activation window.
Once activated, hit “Allow” to the message “Allow this site to see your security key.”
Next, verify your account. Note that Binance will need you to provide the authentication code from Google Authenticator if you had previously enabled this step.
Binance will then send you an email at the registered address for you to confirm the addition of a new 2-step verification method using something you physically have.
After verifying the email, you are done.
Examples of YubiKey-Supported Services
YubiKey works with a host of services such as cloud-based systems, password managers, email platforms, social media, gaming developer tools, cryptocurrency platforms, offline computers, among others.
Examples of cloud-based systems compatible with the security key include Dropbox, DigiCert PKI Platform, DocuSign. Cryptocurrency platforms that support YubiKey include Binance, Coinbase, Kraken, Bitfinex, and Gemini.
Cloud-based systems compatible with YubiKey
Social media platforms with inbuilt support for the hardware key include Facebook, Twitter, Instagram, and YouTube.
For developers and offline computer users, YubiKey is enabled for popular services such as Github and Bitbucket for developers and can be used to login into Mac and Windows computers.
Latest YubiKey Series
The hardware piece is developed in sets, with keys in one batch having additional features than those in previous models.
Yubico YubiKey 5 Series – Keys in this group are compatible with conventional and new systems. It has enhanced passwordless, multi-factor, and 2F authentication. Also, it has a touch-to-sign button, can be inserted on USB-A and C ports, and has NFC capabilities.
Security Key Series – Its salient features include dual NFC and USB-A connectors. Additionally, hardware security pieces in this cluster are crush and water-resistant.
YubiKey FIPS Series – These are certified hardware security keys that can be used for regulated environments such as government institutions. This set weds different functionalities such as one time passwords (OTP), smart card technology, and U2F. Keys in this group have USB-A and USB-C compatibility.
YubiKey 5C NFC – It has support for NFC, USB-C, and provides a fast yet secure authentication process. This series has a longer list of supported operating systems and browsers than other versions.
YubiKey Bio – When released, this will be the latest Yubico YubiKey in the market. Its major selling-points are fingerprint recognition, enhanced security, minimal helpdesk calls, and PIN-based login.
Coming soon: YubiKey bio
Conclusion
From the reviews, it’s clear the YubiKey hardware security key is effectively guarding users against account takeovers. However, which Yubico YubiKey is best suited for your needs depends on its cluster. The newer the series, the more the features and services it can provide.
Despite some users citing complicated documentation, exerting effort to set this up can indeed give that extra layer of security that would keep your accounts safe and give you peace of mind.
Disclaimer: Cryptocurrency trading involves significant risks and may result in the loss of your capital. You should carefully consider whether trading cryptocurrencies is right for you in light of your financial condition and ability to bear financial risks. Cryptocurrency prices are highly volatile and can fluctuate widely in a short period of time. As such, trading cryptocurrencies may not be suitable for everyone. Additionally, storing cryptocurrencies on a centralized exchange carries inherent risks, including the potential for loss due to hacking, exchange collapse, or other security breaches. We strongly advise that you seek independent professional advice before engaging in any cryptocurrency trading activities and carefully consider the security measures in place when choosing or storing your cryptocurrencies on a cryptocurrency exchange.
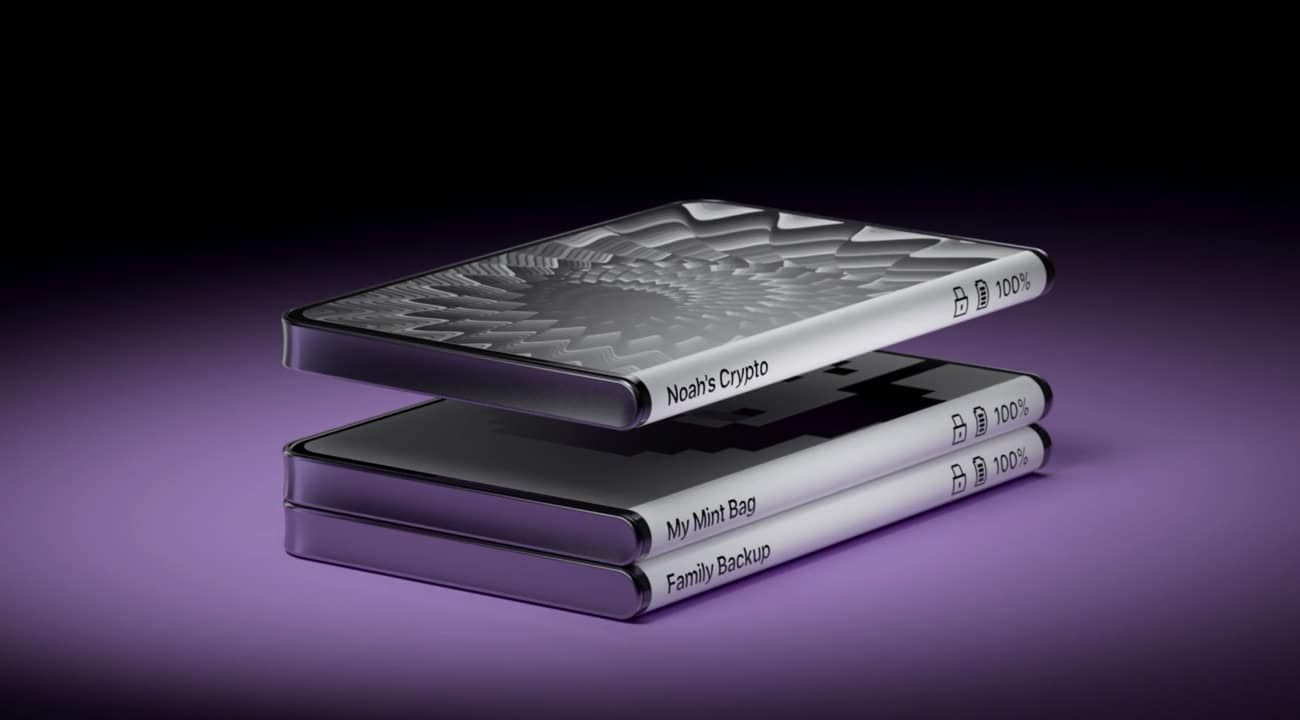
Ledger, one of the top hardware wallet providers, has announced the launch of its new Ledger Stax wallet in partnership with Tony Fadell, co-creator of the iPod and iPhone. This is a significant initiative as Fadell being one of the world’s foremost tech engineer is stepping in to bring clarity and confidence to owning digital assets following the collapse of FTX.
Pre-order your Ledger Stax Wallet here!
Key Features of Ledger Stax Wallet
Fadell realized that existing hardware wallets are difficult to use for mass consumers. Therefore, he drew inspiration from his iPod design to bring a more user-friendly experience for wallet users.
Ledger Stax resembles a small smartphone and has a monochromatic E ink display which covers the front and curves around the spine. That way users can easily view complete transaction details as well as their NFT collections even when the wallet is off. This works in conjunction with integrated magnets, allowing multiple Stax devices to stack, hence its name. This is particularly useful for Ledger owners who have different portfolios since they can look at the labels displayed on the spine, like books on a shelf.
Stackable Ledger Stax wallets with displayable screen on the spine (Source: Ledger)
Users can store more than 500 cryptocurrencies or NFTs on Ledger Stax. Developers are also planning to allow users to explore Web3 applications through the Ledger Live app. Users can connect the Ledger Live app on (1) laptops via secure USB-C or (2) smartphones via bluetooth. This new user interface will enable clear and intuitive interaction for all mainstream users.
Ledger Stax also has good energy efficiency and supports wireless Qi charging. Its battery can last as long as few months with a single charge.
How to Get Ledger Stax Wallet?
Ledger Stax is now available for preorder at $279 and will begin shipping by the end of March 2023. It will also be available from select retailers such as Best Buy in the U.S. Those who purchase the wallet will also receive an Infinity Pass, which provides users with a free utility NFT.
Additionally, a Ledger Stax NFT Bundle is available to mint on [Ledger] Market for 0.22 ETH to redeem a free Ledger Stax device. It also unlocks access to exclusive NFT artwork from Ledger’s network of hand-picked artists. However, Genesis Pass holders and PREMINT Collabs have special mint-priority, and there are only 10,000 bundles available.
Key Takeaway
“Not your keys, not your crypto” — there is a great risk of losing all your crypto if you park it on a centralized exchange. Hardware wallets are great self-custodial solutions because only you have control over your funds. But the problem is it can be quite daunting to operate one, especially for beginners.
Ledger Stax will revolutionize this by bringing the familiar user experience of smartphones into hardware wallets. This is a big step towards a decentralized financial future as more people are opting for self-custodial solutions. If you are interested in other hardware wallets, feel free to check these out:
Pre-order your Ledger Stax for only $279 and get it by end of March 2023!
What is the Ledger Stax wallet?
The Ledger Stax wallet is a new hardware wallet developed in partnership with Tony Fadell, co-creator of the iPod and iPhone. It has a unique and innovative design in the style of high-end Samsung cell phones, and lets users view their NFT collections even when the wallet is off.
When will the Ledger Stax be available for sale?
Ledger Stax is now available for reorder at $279 and will begin shipping by the end of March 2023.
What features does the Ledger Stax offer?
The Ledger Stax wallet is an easy-to-carry device about the size of a credit card, which allows users to store more than 500 cryptocurrencies or NFT collections. It also features an E-Ink touchscreen for viewing NFT collections, and a battery that can last for weeks or even months with a single charge.
Are there any incentives for purchasing the Ledger Stax?
Yes, those who purchase the wallet will be eligible for various prizes, such as a “Magnet Shell” protective case and an NFT from the “The Art On Ledger Stax Collection.”
Ledger, the makers of the Ledger Nano S and Ledger Nano X has announced that their application, Ledger Live now supports buying cryptocurrencies with credit card or bank transfer. This feature is operated with their partners, Coinify, MoonPay, BTC Direct and Wyre, and now users can directly go onto Ledger Live to buy their cryptocurrencies and have them sent to the safety of their Ledger device. No more having to go through extra steps such as buying cryptocurrencies on exchanges and then sending it to your hardware wallet for safekeeping! In this guide, we give you step-by-step instructions on how to buy cryptocurrencies using Ledger Live on your Nano S and Nano X.
Thanks to several crypto platform partners, Ledger Live now offers for purchase more than 40 different cryptocurrencies from the top 50 market cap projects.
Although the available range of cryptocurrencies is quite wide, users who would like to buy other cryptos supported by their Nano S will have to buy them elsewhere, such as cryptocurrency exchanges.
To get started with buying cryptocurrencies using your Nano S or Nano X, open up the Ledger Live application on your PC and go to “Buy crypto” on the sidebar. Choose which cryptocurrency you wish to buy. You can choose from 40+ different coins, including BTC (Bitcoin) and ETH (Ethereum). For the purpose of this guide, we will be demonstrating buying Bitcoin through one of Ledger Live’s partners, Coinify, but purchases using other partner platforms should work in the same way. Choose Bitcoin as the crypto asset we wish to buy. Then choose which account you want your cryptocurrency to be deposited to. Alternatively, you can add a new account for your cryptocurrency purchases- see our section titled “How to add new account for cryptocurrency purchases“.
Click “Buy crypto” on the sidebar
On Ledger Live, you would be asked to either sign up or log in to your Coinify account. For a tutorial on how to set up a Coinify account, see our section titled “How to register a Coinify account on Ledger Live“.
Login or set up a Coinify account
You will then be asked to select the amount of cryptocurrency you wish to buy, the payment currency and payment method. Ledger allows you to pay in the following currencies: AUD, BGN, CAD, CHF, DKK, EUR, GBP, HKD, HRK, HUF, INR, JPY, NOK, NZD, PLN, SEK, TRY, USD and VND. You can pay for your cryptocurrency using credit card (Visa or Mastercard) or for European locations, bank transfer via. SEPA.
Select your cryptocurrency purchase and confirm the transaction.
Because cryptocurrency prices do fluctuate, Ledger will lock in your purchase price and give you 15 minutes to complete the purchase. Enter your credit card details, double check your purchase details and click “Pay”. Your purchased cryptocurrency will be automatically deposited into your designated account on your Ledger device.
Complete payment
How to Register a Coinify Account on Ledger Live
For those who don’t have a Coinify account or are buying cryptocurrencies for the first time on Ledger Live, you will need to go through Coinify’s Know Your Customer (KYC) process and set up an account. On Ledger Live, enter your email and choose a password, then click “Create account”. You will then be asked to answer a few KYC questions.
Create a Coinify account
Confirm your email (Coinify will send you a confirmation email) and location.
Confirm your email and location
Provide information on your residential address and how you plan to use your account.
Provide residential address and account usage
You will also be asked to verify your identity by providing a photograph of your ID Card/ passport and to scan your face similar to setting up FaceID on your iPhone.
Verify your identity
Afterwards Coinify will automatically process your registration which takes around 2 minutes. Then you are all set!
Coinify will process your registration within 2 minutes
How to Add a New Account for Cryptocurrency Purchases
To add an account, click “+ Add account” as shown in the above image. Then choose which crypto asset account you wish to add. For the purpose of this guide, I will be showing you how to add a Bitcoin account, so I choose Bitcoin as the asset and clicked “Continue”. (Xanax) When asked, connect your Ledger device to your PC and unlock it. Then go to the corresponding app for the cryptocurrency you want to buy on the device, your device will say “Application is ready” whilst it synchronises with Ledger Live on your PC.
Once synchronised, you will be given options on which new account you wish to add. Choose the account(s) to add then click “Add account”. Your new account will then be added and you can then choose to either add more accounts or close the window to finish.
How to Purchase Cryptocurrencies on Ledger Live with Other Partners
In addition to Coinify, Ledger Live now also supports buying crypto through partners like Wyre (available only in the US), MoonPay, and BTC Direct. All of these alternative purchasing platforms are KYC (Know Your Customer) compliant, which means for anyone wanting to purchase crypto through them, they will have to provide personal information such as email, full name, address, phone number, and personal ID (driver’s license or passport). However, once that is done and an account has been created for any of these platforms, the purchase and selling of cryptocurrencies within your Ledger Live app should be quick and seamless in very much the same way as the purchase of coins through Coinify.
User Experience and Conclusion
We’ve tried out a lot of cryptocurrency hardware wallets and Ledger’s devices are definitely our preferred choice. This preference is definitely solidified by the fact that we can now purchase cryptocurrencies on Ledger Live because it means we no longer have to buy cryptocurrencies on exchanges, especially when most exchanges require you to go through KYC procedures if purchasing crypto for the first time.
So whilst you do also have to go through KYC procedures when buying with Ledger Live for the first time which is a bit trouble, the whole process only took around 5 minutes to complete. And at the end of the day it is worthwhile to buy cryptocurrencies using Ledger Live in the long run because your cryptocurrency is sent directly to your device which is a relatively safer storage device.
Many may use multiple exchanges and even skip from one exchange to another but at the end of the day your hardware wallet is where most of your cryptocurrency should be stored anyway. Therefore we highly recommend trying this feature out and whilst there are only 4 cryptocurrencies available to purchase, it is generally sufficient as a start to trading on exchanges and we hope and expect that Ledger may add more coins in the future.
Note: Until 8th Aug 2022, Ledger is offering 10% off the Ledger Nano X and Ledger Nano S Plus when entering the code MOVESOL2LEDGER at checkout.
Hot and cold wallets are used to store your cryptocurrencies, specifically your private keys which grant you access to your crypto assets. They are therefore a crucial element of the cryptocurrency space.
The major difference between hot and cold wallets is that hot wallets are connected to the internet whilst cold wallets are not.
For those holding cryptocurrencies, the choice between cold and hot wallets depends on factors such as the amount of coins you hold, the frequency in which you trade etc.
Extra steps are required for trading. Save for the KeepKey which is partnered with ShapeShift exchange, users must first send their cryptocurrencies from their cold wallet to an exchange before they can trade. And when cryptocurrency prices fluctuate by the minute, this can have a profound effect on your gains.
Harder to use. They do require at least 10 minutes for initial set-up, and you will need to plug in your device every time before sending your cryptocurrencies. (www.speedclean.com)
Inconvenient. Even with the Ledger Nano X’s mobile feature allowing you to connect the device to your mobile phone via Bluetooth, it’s still not as convenient as a mobile wallet, which is simply an app on your phone.
Conclusion
Whilst there is a longer list of cons for cold wallets, they are still highly recommended on the basis of significantly improved safety of funds.
Numerous people have suffered from hacks and closures of exchanges. These victims have no way to get their funds back, or at best, it will take a very long time. For example, Mt. Gox exchange was hacked in 2011 and 2014. To date, none of its victims have gotten any of their stolen funds back.
Meanwhile, hot wallets are very convenient — if you leave your funds on exchanges, you can trade with the click of a button.
We recommend keeping small amounts of cryptocurrencies in hot wallets for day-to-day trading or spending only. Whilst the bulk of your cryptocurrencies should be kept in cold wallets. If you obtain any gains from trading, you should also consider how much you want to retain for further trading and immediately transfer the rest to cold wallets.
This setup guide helps you set up your new Ledger Nano S hardware wallet. It will teach you how to backup your wallet and install apps so you can access your cryptocurrencies with it. You can read our full Ledger Nano S review here.
The wallet is one of the most advanced cryptocurrency wallets in the market today. It supports over 1800 cryptocurrencies. The Ledger Nano S also offers better support, compact design, mobility, and security for your crypto-assets. The device retails for USD 59 or you can save 27% when buying a family pack of 3 for USD 129. Important to note that Ledger plans on discontinuing the Nano S sometime during 2022 once they’ve sold the last 10,000 Final Edition units.
Ledger Nano S Unboxing
You can also follow our step-by-step video setup guide here.
Ledger Nano S – Setup and Guide
The first step when you receive your hardware from the store is to check if the box is correctly sealed. If the box is not sealed correctly, return it to the store because there is a high chance that the wallet has been tampered with.
Check that the box is sealed
After verifying that the seal is intact then unbox your device and confirm that all the contents are there. The contents in the box should include:
Ledger Nano S device;
Blank sheet to write down your recovery phrase;
USB cable to allow you to connect it to the computer;
Setup guide manual that contains instructions on how to install and use your device; and
Keyring and lanyard to take your device on the go.
Inside the Ledger Nano S box
Verify that the 24-word recovery phrase card is blank. This 24-word recovery phrase allows access to your private and public key details in case your login details have been lost. If it is already pre-determined, it means that your device has been tampered with.
Setting up the Ledger Nano S
Connect the device to your computer using the USB cable included.
A welcome screen immediately flashes up your device and prompts you to press the two buttons on top to begin.
It will then ask “Configure as a new device?”. Click: – “x” to restore an old device using your recovery phrase; or – “✓” to set up a new device.
Choose “✓” to set up a new device
Setting the PIN Code and Recovery Phrase
Setting the PIN Code
The device will ask you to set a new PIN code. In future, this is what you will enter to access your device.
Input your chosen 4 to 8 digit PIN code by pressing the buttons on either side to choose the digit, then pressing both buttons together to confirm. Re-enter your PIN code to confirm and conclude the PIN code setup process.
Set your PIN code
Setting the Recovery Phrase
You now need to set a recovery phrase that you will use to restore your wallet on another physical device.
Press the 2 buttons of your Ledger Nano S device simultaneously to start.
The device will start displaying the 24 words that make up your recovery phrase one by one. Press both buttons simultaneously to move onto the next word. Write them down in order on the blank recovery sheet provided.
DO NOT take a photo of your recovery words or write them down on your computer- keep it locked away. This is because anyone with your recovery phrase will be able to restore your account on another Ledger device and steal your funds.
Afterwards, the device will prompt you to confirm your 24-word recovery phrase by asking you to input some of the words. Do this to complete the recovery phrase setup.
Write down your 24-word recovery phrase then confirm it as prompted
Your device is now set up and ready to use!
Ledger Live Application Setup
Keep your device connected to your computer. You need to download and install the Ledger Live app to your computer.
Open the Ledger Live app and select: “Initialize as new device.” Click “Ledger Nano S” and follow the instructions that check whether you have installed your hardware wallet correctly. You will then be asked to setup a Ledger Live password.
Ledger live app
To use the device with a particular cryptocurrency, you will need to download the corresponding app on Ledger Live.
Afterwards, the Ledger Live app will ask you to install apps or add accounts. Select “Open Manager” which will allow you to install or uninstall apps.
For example, to use Bitcoin with your device, select “Open Manager”, find “Bitcoin” in the app catalog and simply click “install”. You will now see the Bitcoin app on your device.
Installing apps onto your device
The Ledger Nano S only supports between 3 to 11 apps after its 1.6 firmware upgrade. So if you want to use your device with more than 3 cryptocurrencies, you might find it difficult to fit all of the different apps onto your device in which case you will have to uninstall some apps to make room.
You will not lose your cryptocurrencies if you uninstall the corresponding app. But of course installing/uninstalling apps to use your device is seriously troublesome.
Your Ledger Nano S is now ready to use!
Ledger Nano S setup guide: Conclusion
The Ledger Nano S is relatively easy to set up. The instructions are very clear and intuitive.
Again, ensure that your PIN code and recovery phrase is kept offline and secure. Others can access your funds using your PIN code or restoring your device using the recovery phrase.
The Ledger Nano S is limited to between 3 and 11 apps, depending on the individual app sizes for specific coins. If you have or intend to use more than that amount of cryptocurrencies regularly, you may have to use multiple devices. Or consider getting a Ledger Nano X? Check out our Ledger Nano X review to learn more.
Enjin wallet is a secure and easy to use mobile cryptocurrency wallet (iOS/Android). It’s extremely simple to use and contains advanced features such as Dapp Browser, QR code airdrops, Cryptocurrency Exchanges and Enjin’s own NFT marketplace integration. It’s the most secure mobile wallet we’ve tested with a two-layer security encryption and secure keyboard. Enjin wallet supports a wide range of cryptocurrencies such as Bitcoin, Ethereum (all ERC-20 and ERC-1155 Tokens), Binance Chain, Litecoin, Polkadot and Kusama. Enjin wallet is created as a companion to the Enjin Platform.
Best Software Wallet Award
Enjin Wallet is our Gold Award winner in the Free / Software wallet category. We were impressed by the wallet’s security features such as custom memory sweeps and double encryption. Enjin wallet is our top recommendation for any beginner who wants to keep their cryptocurrencies safe.
Is Enjin Wallet Safe to Use?
Security is the biggest concern for wallets as hackers are known to attack various wallets and attempt to steal funds. Enjin wallet offers the best in class security for mobile wallets.
Two-layer encryption: Hardware AES and software encryption is employed on the lower and application layer respectively
Secure keyboard: The protected keyboard bars keyloggers and/or data sniffers from tapping into your mobile device to steal data. It can also be randomized to increase security.
Screenshot blocking and Random Access Memory (RAM) encryption: The wallet’s operating system level restricts screenshots and video recording. On the memory level, transactions are conducted on a secure RAM.
Custom libraries: Enjin Wallet features custom libraries that remove the private keys from the device memory after use – significantly reducing the attack service.
Protection processor flaws: special code is put in place to deal with flaws in ARM processors.
Security Audited: ORU security team found no issues that could be used to compromise the wallet or the cryptographic keys stored in the system (full security report here)
Samsung Blockchain Keystore support: Enjin supports the Samsung Blockchain Keystore for private key protection under Samsung’s military grade security Knox.
Mobile wallets are classified as a “Hot Wallet” – meaning this wallet is connected to the internet. The Enjin team has devised special counter-measures to deal with hackers attempting to steal cryptocurrencies. All private keys are double encrypted, so even if hackers stole the file it cannot be decrypted. On top of this, the special designed Enjin keyboard deals with keyloggers – making sure that the on-device decryption process is safe. Lastly Enjin used custom libraries to wipe the private key from device memory once the transaction is sent – unlike other mobile wallets.
We added many security features that regular wallets don’t have. Enjin Wallet cannot be Keylogged and not affected by CPU flaws like Meltdown and Specture.
Hot wallets are generally considered less safe due to possible device based vulnerabilities (CPU or Memory flaws) which could compromise the security of the mobile phone. That being said, Enjin wallet’s can be considered to be the best out of all mobile wallets. For large amounts of cryptocurrency storage, we recommend the use of cold wallets like the Ledger Nano X.
We found the security of Enjin Wallet to be the best among mobile wallets, with external security audits confirming our viewpoint. We give it the highest security rating of 4/5 – the highest possible rating for “hot wallets“.
Security: 4/5
What Cryptocurrencies does Enjin Wallet Support?
The Enjin wallet supports the storage of Bitcoin (BTC), Ethereum (ETH), Litecoin (LTC), Binance Coin (BNB), Binance Chain tokens (BEP2), Polkadot (DOT), Kusama (KSM) and Ethereum-based tokens. For Ethereum-based tokens, Enjin supports those created using the ERC20 and ERC1155 standards. Select ERC-721 collectible tokens are also supported, namely for God’s Unchained, CryptoKitties, Blockchain Cuties and Axe Infinity.
The ERC1155 tokens fit into the Enjin ecosystem as these tokens can represent in-game assets. This fits perfectly into Enjin’s game development ecosystem for blockchain-based games.
The wallet allows users to sort, view, and show virtual currency balances in your local currency. Enjin’s partners Bancor, Kyber, and Changelly allow you to easily swap tokens.
Multi-currency Support: 4/5
Enjin Wallet Cryptocurrecy Exchange Interface
Design and interface
The Enjin wallet sports a clean and intuitive design. The wallet also allows you to easily switch from viewing your balances in cryptocurrency or the equivalent in your local fiat currency. This is extremely helpful in allowing you to know how much your portfolio is worth with a simple glance.
What is also helpful is the ability to easily create additional wallets. So say if you send or receive cryptocurrencies for different purposes, you can create a wallet for each of them (kind of like having partitions in your actual physical wallet) which makes managing your finances very convenient and easy to trace.
One slight gripe I have about the Enjin wallet is that when you look at the individual cryptocurrency balances in your wallet, there is a discrepancy in the balance shown at the top and the bottom (which is the correct balance). Though this does not affect your usage of the wallet, you just need to know and accept that the bug is there.
The balances shown are inconsistent, the one circled in red is actually correct
Despite this, Enjin wallet makes up for it with the fact that features the cleanest interface out there and additional functions not seen in any other software wallet. Because as we will see below, the Enjin wallet is more than a really good software wallet. The wallet is only one small part of Enjin’s whole gaming ecosystem. Rather, the wallet opens up additional features such as a QR code scanner, wallet for in-game collectible items and marketplace for you to trade these collectibles.
Other features on the Enjin wallet
Software design: 5/5 Ease of use: 5/5
Final thoughts- my experiences with Enjin wallet
I personally store small amounts of crypto on the Enjin Wallet so I can trade, or pay or receive crypto on the go. It has an easy to understand interface with a wide range of supported coins. So I have no hesitation to use it as my primary wallet. I had friends who were new to cryptocurrency and were completely overwhelmed when hearing other people talk about hardware wallets, exchanges and crazy hacks. I showed them my Enjin Wallet and it only took them less than 30 minutes to install and master. My guess is that without Enjin wallet’s simple and easy to understand design, they would have not bothered with cryptocurrencies at all. 6 months on, they are now trading cryptocurrencies regularly.
Enjin Wallet Ecosystem
Collectable Token Support
Enjin has created its own ERC-1155 digital token standard which can be used to create both fungible (currencies) and non-fungible (NFT) (digital cards, pets and in-game skins) assets on the Ethereum Network.
With the Enjin wallet, you can receive, send or melt these NFTs. The NFTs can be collectable items or in-game assets.
You can use the wallet to trade NFTs with your friends and there are Telegram forums dedicated to buying and trading collectibles!
Boxmining NFT collectable items
To learn more about all the games and the Enjin Multiverse, check out their website. Though a fantastic feature, the Enjin Mintshop, where you could mint your own NFTs was unfortunately deprecated upon launching the public mainnet of the Enjin Platform in 2020.
Boxmining collectable items are frequently given out as a way to say “Thank you!!” to our fans. Subscribe to Boxmining’s YouTube channel and click the notification bell so you don’t miss out!
Scan for QR Airdrops (Enjin Beam)
Enjin Beam QR giveaway
These giveaways could be found on various websites, games, and promotions on the Boxmining Channel. The Enjin Beams can take two forms: Airbeam, which sends all users the same collectible, or Lootbeam, which includes a variety of assets of varying rarities, so each user is likely to get different combinations of these loot assets. Read more about Enjin Beam here.
Enjin Wallet Marketplace
Collectibles listed for sale on the Marketplace in the Enjin Wallet
Digital Collectible items (ERC-1155 tokens) can be directly sold on the Enjin marketplace using the built in features of the Enjin Wallet. This first of a kind feature allows gamers to trade items safely without any risk by using ethereum smart contracts. Items can be listed on the marketplace by using the “sell” feature in the Collectibles tab. The procedure is a 1 step process where seller directly inputs a selling price and confirms by executing the contract on Ethereum (paying gas in the process). The item will be directly listed on the Enjin Marketplace for public purchase.
Exchange Function
Enjin’s partners Changelly, Bancor, and Kyber allow users to easily swap between different cryptocurrencies. All you need to do is type in the amount and type of cryptocurrency you want to convert and the cryptocurrency you want to convert it to. The amount you will receive and the details of the transaction will be automatically calculated and displayed you. If more than 1 exchange offers the type of conversion you want, the information will be displayed for you to compare and choose the one that’s best for you. Then all you need to do is press “convert” and it’s done!
Enjin wallet’s exchange function
Marketplace
The Enjin wallet also allows you to directly access their Marketplace, where you can browse and buy various NFTs. Payment can be made directly from your Enjin wallet.
Enjin’s marketplace for NFTs
Dapp Browser
Enjin Dapp Browser Support
Enjin wallet includes one of the best Decentralized App Browser we’ve ever seen. The clean user interface displaces the various Exchanges, Financial, Games and Social Media Services.
Open up the app, select “crypto wallet” and then “create wallet“.
Select “crypto wallet” and then “create wallet”
Select the password you want for your wallet. When setting up your passwords and later backing up your wallet, make sure you are in a secure environment where you are not being recorded. Thieves will be able to access your wallet if they obtain this information.
Then, select which cryptocurrencies you would want to hold in your wallet. You can always add or remove more types of cryptocurrencies later. Then press “create wallet“.
Select your password and the cryptocurrencies you want your wallet to hold
The app will then ask if you want to backup your wallet. This is so that you can reinstate your wallet at a later date, for example when you change your phone and need to reinstall everything. So it’s highly recommended to do this step, even though it may seem tedious.
The backup is a 12 word recovery phrase that you will need to correctly re-enter to reinstate your wallet. So keep these 12 words recorded and stored in a safe place. See here for some ideas and tips on how to keep your recovery phrase safe.
Backing up your wallet
You will then be asked to verify your passphrase by entering 2 of your 12 word recovery phrase at random. You will then be taken to the select coins menu where you have another chance to select the coins you want to hold in your wallet. Again, you can choose to add other coins later. If you are happy with the list of coins selected, click “create wallet“. The setup is then completed and you will then be taken to the main page of your wallet.
Backing up your wallet
How to Send and Receive Cryptocurrency Using Enjin Wallet
Sending Cryptocurrency
On the main page of your wallet, select the cryptocurrency you wish to send.
For this demo I will be sending Bitcoin, so I selected “BTC”.
Then on the following page (second picture below), select “send“. On this page you can also see your transaction history for this cryptocurrency. Note: the balance shown on the top left hand side of the second picture below is sometimes inaccurate. This is a bug in the app which hasn’t been fixed yet. However this is only a display issue and does not affect your actual wallet balance which is displayed in the larger font.
On the send page (third picture below), I usually select “Advanced mode” which allows you to type in the number of satoshis per byte you wish to send your cryptocurrency with. The more satoshis per byte, the faster the send and of course the higher the transaction fee.
Sending cryptocurrency
On the send page you have 3 options for inputting the receiver’s address, either: (a) type in the address; (b) paste the address; or (c) scan the recipient’s QR code address.
For the demo I will scan the recipient’s QR code address, so I selected the QR code icon on the top right hand corner, which opens up my phone’s camera, as shown in the second picture below. There I can either choose a QR code from my photo gallery, or in this case, I scanned the QR code of the recipient.
Input receiving address
Once you’ve scanned the recipient’s QR code you will be brought back to the send page (first picture below) with the recipient’s address filled in. In the secondentry you can enter in the amount you wish to send or simply click “ALL” to send the entire balance in your wallet. And in the third entry the number of Satoshis per byte, which as mentioned will determine how fast your transaction will be sent.
To see how many satoshis per byte I would want to send my cryptocurrency with I go on the website whatthefee. This website gives an estimate of how fast my transaction will go through at any given time (second picture below). On the table, the figures in black represent the percentage likelihood a transaction will take a given length of time. The figures in the middle represent the number of satoshis per byte. So for example, the green shaded entry on the top right hand corner means that with 20.1 satoshis per byte, there would be a 95% chance your transaction will go through in 0.5 hours. The higher the satoshis per byte, the faster my transaction and consequently the higher the transaction fee.
Enter in the details and confirm
Once you’ve entered in the recipient’s address, send amount and satoshis per byte, click “next step“. This will bring you to the confirm transaction page (third picture above). Here you can double check that the details are correct, if it is, click “send now“. Now you are all done!
Receiving Cryptocurrency
On the main page of your wallet, select the cryptocurrency you wish to receive. If the cryptocurrency you want to receive is not shown, click the “+” button on the top right hand corner, select the coin you want to receive and then click “update coin list”.
For this demo I will be receiving Bitcoin, so I selected “BTC”. Then on the following page, select “receive“. Your Bitcoin address will then be displayed in the form of a string of letters and numbers, or a QR code representing your address. You can then either (a) copy the address and give it to whoever will be sending your cryptocurrencies; or (b) have them scan your QR code address.
Note: the balance shown on the top left of the second picture below is sometimes inaccurate. This is a bug in the app which hasn’t been fixed yet. However this is only a display issue and does not affect your actual wallet balance which is displayed in the larger font.
Receiving cryptocurrency
When the cryptocurrency is successfully sent to your wallet, the balance on your main page will be updated. Tip: You can select the small circular arrows next to “value” to display the balance in your local currency or the cryptocurrency itself.
Successfully received- your balance on the main page of the wallet will be updated
Congratulations! You are all set!
Successfully set up your Enjin wallet? Learned how to send and receive crypto? Now it’s time to get started with trading Bitcoin and other cryptocurrencies! Check out my course created in collaboration with Jeff Kirdeikis of Uptrennd- Bitcademy: Learn, Invest & Trade Bitcoin – In Under an Hour
Enjin Wallet 2.0
Enjin is also currently enrolling users in testing its Enjin Wallet 2.0 Beta, although it’s only available for Android users. This new wallet will be a completely re-written Enjin Wallet from the ground up, including all of the code to ensure better performance, stability and reliability, as well as a completely new UX and design.
If you want to participate in testing the Enjin Wallet 2.0 Beta, you can sign up here!
FAQs
How to download the Enjin Wallet?
The wallet is available for use on mobile devices powered by iOS or Android operating systems. Download the Enjin wallet on the Apple App Store or Google Play Store.
Can I import cryptocurrencies from other wallets to the Enjin wallet?
The Enjin wallet allows coins to be imported from other cryptocurrency wallets. Examples of cryptocurrency wallets are: Bread, Eidoo, Exodus, Coinomi, MetaMask, Trezor Model T, Ledger Nano S, Ledger Nano X and Jaxx.
The wallet uses an extremely interactive and secure user interface. This eliminates the confusion of copying and pasting addresses.
How does Enjin bring NFTs to Video Games?
One of the key features unique to the Enjin Wallet is the ability to bind the wallet to various video games. So together with the ability to send and receive, scan QR codes and their Marketplace, players can obtain NFT tokens representing various in-game items and import them into different video games. This allows players to truly own digital assets – the items are not stored centrally on databases but on the Ethereum blockchain instead. (https://www.hanakaimaui.com/)