Category: Latest News

  • Nillion ($NIL) token airdrop guide

    Nillion ($NIL) token airdrop guide

    Nillion ($NIL) is a secure computation network that enables developers to create applications with a focus on high-value, privacy-preserving data processing by decentralizing trust similar to how blockchains decentralize transactions. Nillion has completed its airdrop campaign and it is now available to claim! Here is our Nillion ($NIL) token airdrop guide.

    Check out our step by step guide on how to claim your Nillion ($NIL) token airdrop!

    Check out our Nillion token airdrop guide!

    What is Nillion?

    Nillion is a decentralized network designed for secure computation of high-value data. Here are its main features:

    • Privacy Enhancing Technologies: Utilizes Multi-Party Computation (MPC) and other technologies to ensure data privacy.
    • Secure Data Storage: Allows users to store sensitive data on a peer-to-peer network without the need to decrypt it for computations.
    • Computation on Masked Data: Enables computations on hidden data, maintaining security while processing.
    • Diverse Applications: Supports a range of use cases, including private predictive LLMs, healthcare, password management, and trading data.

    These features collectively aim to decentralize trust similar to how blockchain technology has decentralized transactions.

    How to get the Nillion token airdrop

    Here’s our guide on how to get the Nillion token airdrop

    1. Go to Nill Pill quest page

      Go to the Nill Pill page https://nillpill.nillion.com/ and click “Take the Pill”. Then, enter your ERC-20 wallet address.

    2. Watch videos and answer quizzes

      Watch the 3 short videos. These videos explain the importance of AI privacy and how Nillion will address these issues. After watching the videoes, answer the multiple-choice questions.

      Here are the answers to the Nill Pill quizzes:
      Nill Pill Quiz 1: B C A
      Nill Pill Quiz 2: B B C
      Nill Pill Quiz 3: C C B

      Note one of the questions will require you to answer in your own words.

    3. Save code

      Once you have answered the quizzes correctly, you will be provided with a code. Save the code carefully, as it will be needed for future NFT minting or whitelisting processes.

    4. Add Zillion to Keplr wallet

      Add Nillion to your Kepler wallet by visiting https://chains.keplr.app/ and searching for Nillion. Then click “manage” and the tick button to see your balance in Kepler.

    5. Claim testnet tokens

      Go to the Nillion Faucet and submit your address to claim testnet tokens. Complete the CAPTCHA to receive the tokens. It is recommended to return every 24 hours to claim more testnet tokens. However, do avoid over-spamming.

    6. Send Nillion tokens to another wallet

      Send the Nillion tokens to another wallet address. You can use any address on the Nillion Testnet Explorer. If you’d like, you can send tokens to our address at nillion1dls7x2ndtg8axzz4cx735ec9j8s0s5txta0krg. We can also send you some Nillion tokens in return.

    7. Stake Nillion

      To Stake Nillion, to go https://testnet.ping.pub/nillion and click “Delegate”. Choose a validator to delegate your tokens to. We recommended polkachu.com and Lavender.Five Nodes, but any validator will work.

    8. Enter codes

      Enter the 5 codes into Terminal (for Mac users) or Command Center (for Windows users). The codes and detailed instructions can be found at https://docs.nillion.com/nillion-sdk-and-tools.  If you encounter a path error, use ChatGPT to find the correct command for your setup. Wait approximately five minutes for the Nillion SDK to download. Then enable telemetry by entering your Ethereum wallet address in the specified command. Confirm successful setup when you see tools dash config and random numbers in your terminal. Then close your terminal once the setup is complete. Alternatively, use a VPS for more advanced tasks like running a node or claiming tokens regularly from faucets.

    9. Complete Zealy quests

      Go to Nllion’s Zealy quest page and complete the tasks. Tasks include following Nillion’s social media channels.

    10. Become a Nillion verifier

      To become a Nillion verifier, first connect your Keplr wallet to the Nillion verifier portal and fund it with NIL tokens from the Nillion Faucet. Next, install Docker, pull the Nillion verifier image, and initialize the verifier to generate credentials for registration. Finally, run the verifier in the background, upload weekly data (“secrets”) to strengthen the network, and optionally stake ETH to enhance your impact score.

    11. Claim airdrop

      Connect your wallet to https://claims.nillion.com/ to check and claim your Nillion ($NIL) token airdrop.

  • Lens Protocol Token Airdrop Guide

    Lens Protocol Token Airdrop Guide

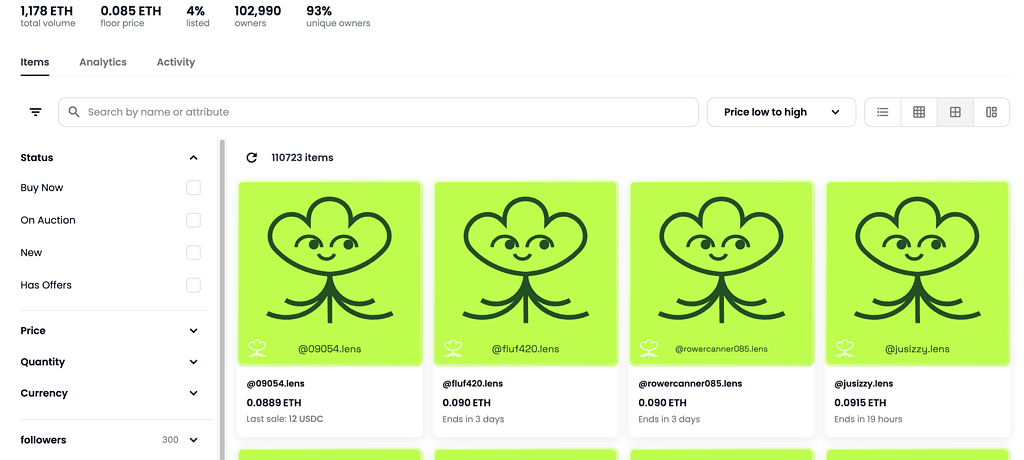
    Lens Protocol is a next-generation Social-Fi platform that is both permissionless and non-custodial. Lens Protocol allows users to build their profiles as NFTs and interact socially on-chain. Users are already selling their profile NFTs on Opensea with a floor price of ~150 USD, meaning that there is a high demand for these profiles. They have also launched their testnet for users to try out their platform, meaning that a potential airdrop may be on the horizon. This is our ultimate guide on how to get the potential Lens Protocol token airdrop.

    Check out our step by step guide!

    Lens Protocol Airdrop Step-by-Step Guide

    Here’s a step-by-step guide on how to get a potential Lens Protocol token airdrop:

    1. Sign up for the early access waitlist here.
    2. Collect people’s posts at least once a week on Lenster.
    3. Like and post videos on Lenstube.
    4. Collect posts on Lensport.

    See below for more details.

    What is Lens Protocol?

    Lens Protocol is a composable and decentralized social graph that users can build upon. Users simply have to mint a profile (in NFT form), follow other users, and collected publications. Lens Protocol will allow users to control their own profile, including how they monetize it. The blockchain that is the basis of the lens protocol is a Polygon PoS network.

    The team behind Aave Protocol has structured Lens Protocol in such a way that various services can be built on top of it, with a focus on publications like individual user-owned profile NFTs, posts, comments, and mirrors (similar to retweets).

    Little is known about who is funding Lens Protocol. Except that FTX Ventures invested an unknown amount into the project. Built on Polygon, it allows users to create and control their own social media content.

    Lens Protocol V2 has recently been announced, promising to bring even greater control to builders and integrators, as well as those exploring web-3 powered experiences. It will introduce new features such as Open Actions, Collective Value Share, New Follow Architecture, as well as an improved Profile Manager. The waitlist for early access to Lens Protocol V2, users should sign up as soon as possible!

    Unique features of Lens Protocol

    Lens Protocol aims to address significant flaws in the current social media environment. Presently, all Web2 networks are reading from a unique, centralized database that cannot be ported elsewhere, meaning that your profile, friends, and content are locked onto the network owned by the network operator. Therefore, each network will be a zero-sum game for your attention.

    Lens Protocol attempts to solve this by creating a user-owned, open social graph. Since users own their own content, they no longer need to worry about losing their content, audience, and livelihood based on a platform’s algorithms and policies.

    The protocol can be plugged into applications that developers build. There are already hundreds of applications built on top of Lens Protocol.

    Lens Protocol
    Lens Protocol (Source: Lens Protocol)

    Lens Protocol Profiles

    Lens Profiles are NFTs with unique names that end with the “.lens” suffix. All activities revolve around Lens profile NFTs, and users can create multiple profile NFTs per wallet address they are using. Compared to other protocols that deal with on-chain identities on the blockchain, the big difference is that the Profile NFT of Lens Protocol can store publication records. Their wallets can claim users’ content. Lens issued Profiles to the community by signing open letters and cooperating with project parties. After receiving Profiles, users can set a lens handle (similar to Twitter handle, Twitter name).

    Currently, it is not possible to freely obtain a Lens protocol, so users have to watch out for upcoming campaigns, including offline meetups. Some users have started listing their own profiles on OpenSea, trying to flip it for a profit.

    How do I become eligible to claim a Lens Profile for free?

    During community events and collaborations with different projects, the project issued lens profiles. Snapshots took place prior to the 15th of August 2022 so users who were part of the events were able to obtain their .lens profiles for free.

    LATEST: How to get a Lens profile

    Users can now get a Lens profile at https://claim.lens.xyz/. However, it is no longer free and users must pay either US$10 or 8 $POL.

    Lens Protocol token

    Lens Protocol has launched its testnet and users interact with it via the GRASS token. The GRASS token is the native gas token for the Lens Network, primarily used for covering transaction fees on the blockchain. It plays a crucial role in enabling interactions within the Lens Protocol ecosystem, such as minting NFTs, deploying smart contracts, and other on-chain activities. Note however that the GRASS token has NOT been launched yet so it is not currently being traded.

    How to receive the potential Lens Protocol airdrop?

    Time needed: 6 minutes

    Here is how to receive the potential Lens Protocol airdrop

    1. Sign up

      Go to https://testnet.lenscan.io/ and click “Sign in” on the top right hand corner. Sign up with your Google account.

    2. Add network

      Click “Add network” at the bottom right hand corner of the page and approve the transaction in your wallet.

    3. Get testnet tokens

      Click “Faucet” at the bottom right hand corner of the page and enter your wallet address to get testnet GRASS tokens.

    4. Complete maze challenge

       Choose between the easy, medium and hard difficulties for the maze. The harder the maze, the more testnet GRASS tokens you would get. You can request testnet GRASS tokens via this faucet once every 24 hours.

    5. Mint your Lens reputation

      Go to https://lensreputation.xyz and connect the same wallet you used to get the testnet GRASS tokens. You will have a reputation score based on your interactions with the Lens platform. Click “Mint your Lens reputation” to mint. If your reputation score is 0, interact with the Lens platform in order to raise your score.

    6. Deploy contract

      Go to https://lens-agora.vercel.app/create and connect the same wallet you used to get the testnet GRASS tokens. Fill in the details such as the contract name, token symbol and description to create your own contract. Deploy your contract, note that the process may take a few minutes to complete.

    7. Bridge tokens

      Connect the same wallet to https://portal.testnet.lens.dev/bridge. Bridge ETH Sepolia to from Ethereum Sepolia Testnet to Lens Network Sepolia. If you need testnet ETH Sepolia tokens, you can go HERE to get some from their faucet.

    8. Complete guild quests

      Go to https://guild.xyz/lens/smart-posts-open-actions and connect your same wallet. Click “Join Guild” and connect your social media accounts such as your  Telegram, Twitter, Github etc.

    Lens Protocol airdrop review

    When reviewing an airdrop, there are several factors to consider. First, the likelihood the project will even do an airdrop in the first place. Then, to look at how many tokens the project intends to allocate towards airdrop campaigns, as well as the difficulty in participating in their airdrop. It is also important to look at the utility of the token so that there will be an actual use and purpose in participating in the airdrop in the first place. Finally, a factor to consider when reviewing an airdrop is whether the airdropped tokens are subject to any lockup period.

    Likelihood of Airdrop: There is no official announcement for a Lens Protocol token airdrop. Our team has screenshotted deleted tweets from the project hinting at an upcoming airdrop, suggesting they have planned something not yet revealed to their community. They have also launched their testnet which suggests they may reward users who help them test their platform with an airdrop.

    Airdropped Token Allocation: Likely this number is high as social platforms need a huge audience – and there is not better way to build a that then with airdrops.

    Airdrop Difficulty: Currently you can buy a Lens profile but this requires real funds. However, interacting with the platform is free as it is only on the testnet stage.

    Token Utility: The token utility is unknown.

    Token Lockup: The token lockup period is unknown.

  • Billions token airdrop guide

    Billions token airdrop guide

    Billions is a groundbreaking network combining humans and AI, using mobile-first verification to expand the value-driven internet. They currently have a campaign where you can complete various tasks to earn points, known as “Power”. Collecting power could pave the way to a potential airdrop. Here is our Billions token airdrop guide.

    Check out our step by step guide

    What is Billions?

    Billions is a pioneering network that integrates humans and AI, leveraging mobile-first verification to enhance trust and scalability in the digital economy. Its main features include zero-knowledge verification technology for secure identity validation, decentralized proof-of-uniqueness, and privacy-focused solutions to combat issues like deepfakes and bot attacks. Key investors in Billions include Deutsche Bank and HSBC, who have tested its institutional-grade verification system.

    How to get the Billions token airdrop?

    Here is a guide on how to get the potential Billions token airdrop

    1. Sign up to Billions

      Go to Billions and sign up with either your Google or Apple account. Verify your email to receive news from Billions and earn 200 Power (their platform’s points system)

    2. Connect accounts

      Connect your Ethereum address and X account to your Billions account.

    3. Refer and share

      Refer your friends and share the project on X to earn additional points.

    4. Stay updated

      Follow their social media pages and keep notifications on to stay updated on new tasks and updates. This potential airdrop is still in its early stages, so more tasks will come as time goes on.

  • SoSoValue token airdrop guide

    SoSoValue token airdrop guide

    SoSoValue is an AI-powered crypto trading platform offering tools for market analysis, macroeconomic insights, as well as real-time data tracking. They have a campaign where you can complete various tasks to earn points. This could result in a potential token airdrop. Here is our SoSoValue token airdrop guide.

    Check out our step by step guide

    What is SoSoValue?

    SoSoValue is an AI-powered cryptocurrency investment platform that integrates centralized finance (CeFi) and decentralized finance (DeFi) to provide real-time market analysis, automated portfolio management, and investment strategies. Its main features include AI-driven market insights, the SSI Protocol for decentralized portfolio management, and tools for efficient and transparent crypto investing.

    The platform has raised a total of US$19.1 million in funding through two rounds: US$4.15 million in a seed round in June 2024 and $15 million in a Series A round in January 2025. Key investors include Mirana Ventures, SafePal, HongShan, GSR, Alumni Ventures, and others.

    How to get the SoSoValue token airdrop

    Here is a guide on how to get the potential SoSoValue token airdrop

    1. Sign up for SoSoValue

      Go to SoSoValue and sign up for an account.

    2. Complete tasks

      Click on “EXP” at the top right hand corner to go to the dashboard. Complete the listed tasks. Tasks include daily check-ins and interacting with their social media pages.

  • Orochi Network ($ON) token airdrop guide

    Orochi Network ($ON) token airdrop guide

    Orochi Network ($ON) is the first Verifiable Data Infrastructure that leverages Zero-Knowledge Proofs (ZKPs) to create a high-performance Verifiable Data Pipeline for AI/ML models, zkApps, dApps, and smart contract platforms. Their latest Contribute to Earn campaign could lead to a potential Orochi Network ($ON) token airdrop! Here is our Orochi Network ($ON) token airdrop guide.

    Check out our step by step guide!

    What is Orochi Network ($ON)?

    Orochi Network is the first Verifiable Data Infrastructure that leverages Zero-Knowledge Proofs (ZKPs) to create a high-performance Verifiable Data Pipeline for AI/ML models, zkApps, dApps, and smart contract platforms. It addresses critical scalability, privacy, and data integrity challenges in blockchain ecosystems. Here are the main features of Orochi Network ($ON):

    • High Performance: Efficiently handles high-performance applications by utilizing a data availability layer and a distributed source of trustless randomness.
    • Security: Employs Multi-Party Computation (MPC) and ZKPs for top-notch security, ensuring no data breaches or third-party involvement.
    • Cost-Effective: Focuses on efficiency and effectiveness, delivering tangible results for every dollar spent.
    • User-Friendly: Designed with a simple UX/UI, making it easily adaptable for any user.
    • Decentralized and Verifiable: Utilizes cryptography to guarantee decentralization and verifiability in a trustless manner.

    Products:

    Orochi Network offers several key products, including:

    • zkDatabase: A verifiable database solution.
    • zkMemory: A verifiable memory solution.
    • Orocle: A decentralized oracle service.
    • Orand: A verifiable random number generator.
    • OroSign: A verifiable digital signature service.
    • zkDA Layer: A zero-knowledge data availability layer.

    Investors:

    Orochi Network is backed by several venture capital firms, including Anti Capital, Aza Ventures, Bolts Capital, Connectico Capital, and Maxx Capital.

    What is the Orochi Network ($ON) token?

    When issued, the Orochi Network token ($ON) aims to fuel innovation in zero-knowledge technology, empowering a decentralized world where individuals and organizations can thrive without compromise. The main features of the $ON token will include:

    • Interoperability and Scalability: Ensuring seamless integration and high performance across various platforms.
    • Resource Payment: Facilitating payments for resources within the network.
    • Proof Generation: Enabling the generation of verifiable proofs.
    • Verifiable Computation: Supporting verifiable computation processes.
    • Validation Rewards: Providing rewards for validation activities.
    • Incentive Ecosystem: Creating an incentive-driven ecosystem.
    • Storage: Offering storage solutions within the network.

    Note that Orochi Network has not yet issued the $ON token. Therefore, users should be careful of potential scams and verify information from official channels. Particularly from any websites or individuals that claim to offer the Orochi Network ($ON) token for trading.

    How to get the Orochi Network ($ON) token airdrop?

    Time needed: 10 minutes

    Here is a guide on how to get the potential Orochi Network ($ON) token airdrop

    1. Sign up

      Go to https://orochi.network/onactive and sign up for an account.

    2. Input code

      To find the code, go to their Discord channel at https://discord.com/invite/sTU4TUh8H3 and verify so you can unlock all the channels. Go to the “on-active” channel to get the code. Then, enter the code on the Orochi Network website and click “Verify code”. Note you will have to do this step quite quickly because other people may use the code before you. Repeat this step and input more codes to verify.

    3. Use meme generator

      Go to https://orochi.network/meme-generator and upload any image.

  • Cytonic ($CYTO) token airdrop guide

    Cytonic ($CYTO) token airdrop guide

    Cytonic ($CYTO) is a blockchain creating an easy, interoperable ecosystem for Web3 technologies and DeFi protocols. They have launched an airdropp app which essentially confirms they will be doing a token airdrop! Here is our Cytonic ($CYTO) token airdrop guide.

    Check out our step by steo guide!

    What is Cytonic ($CYTO)?

    Cytonicv ($CYTO) is an innovative L1 blockchain designed to create a highly interoperable ecosystem for Web3 technologies. It offers zero-effort onboarding for DeFi protocols, compatibility with existing developer tools, integration with popular wallets, and a robust PoS consensus mechanism. Cytonic leverages multi-virtual-machine technology to support multiple virtual machines, including Solana VM and EVM. Main features of Cytonic include:

    • Zero-effort onboarding: Developers can deploy their protocols on Cytonic with just a few clicks.
    • Compatibility with existing developer tools: Supports tools for Solana, Ethereum, and other blockchains.
    • Integration with existing wallets: Users can access protocols using their preferred wallets.
    • Atomic parallelism: Enables scaling of its consensus mechanism while maintaining atomic transaction execution.

    Cytonic has raised US$8.3 million in a seed funding round led by Lemniscap and Lattice Capital, with participation from IOBC Capital, Public Works, Nomura Holdings, and Arthur Hayes.

    How to get the Cytonic ($CYTO) token airdrop?

    Time needed: 10 minutes

    Here is a guide on how to get the potential Cytonic ($CYTO) token airdrop

    1. Select preferred layer 1

      Go to Cytonic, you will get to choose between Cytonic Ethereum and Cytonic Solana. Choose your preferred Layer 1. For this guide, we will be using Cytonic Ethereum.

    2. Add Cytonic

      Click on “Add Cytonic Ethereum to wallet”. Then, click on the “Launch Airdrop App” button to register and sign in. Use MetaMask to input your name. For additional bonuses, enter the referral code ALPHADROP in the provided section.

    3. Get testnet tokens

      Go to https://www.cytonic.com/evm. Enter your wallet address to receive the tokens.

    4. Make a Deposit

      Return to your dashboard and ensure your Twitter/X account is connected. Head to the “Deposit” section and choose your chain and token. You just need to make one transaction; the amount does not matter. For instance, you can deposit 1 USDC and allow the platform to spend that USDC or chosen token.

    5. Complete acheivements

      Go to the “Achievements” section and complete all listed tasks. These are social tasks such as joining Cytonic’s social media channels. Upon completion, collect your rewards.

    6. Participate in extra activities

      Explore additional activities on the “Flip Quest”, “Leaderboard”, and “Lottery” sections. You can also open chests for more rewards.

  • MilkyWay ($milkTIA, $MILK) Token Airdrop Guide

    MilkyWay ($milkTIA, $MILK) Token Airdrop Guide

    MilkyWay ($milkTIA, $MILK) is the first ever liquid staking protocol for Celestia’s TIA tokens. There are rumours that MilkyWay has the potential to airdrop $50 PER WALLET. Also, the MilkyWay team are working to allow its users to also qualify for a potential Celestia ($TIA) token airdrop! This means an opportunity for DOUBLE airdrops! This article is a guide to the MilkyWay ($milkTIA, $MILK) potential airdrop.

    Check out our Celestia ($TIA) token airdrop guide HERE.

    Check out our UPDATED milkTIA Celestia Staking airdrop video guide

    What is MilkyWay?

    MilkyWay offers a liquid staking solution for Celestia’s TIA. By staking your TIA coins with MilkyWay, you receive an on-chain representation of your TIA staking position called milkTIA. The staked TIA is used to secure Celestia. You can utilize milkTIA for various DeFi activities.

    Does MilkyWay have a token?

    MilkyWay will have 2 tokens, $milkTIA and $MILK. milkTIA tokens are distributed as a reward for staking TIA tokens on MilkyWay. milkTIA tokens can be used for lending, staking derivatives, perpetual trading and as payment for Blobspace and gas on Celestia.

    On the other hand, $MILK will be the native token of the MilkyWay Protocol. $MILK holders will receive a portion of the 10% protocol fee charged on all staking rewards generated by milkTIA holders. $MILK will also be the governance token of the MilkyWay Protocol, meaning that $MILK holders will have the power to vote on changes to the protocol.

    Will MilkyWay do an airdrop?

    MilkyWay have announced they have completed their final snapshot for their Massdrop program which began on 14th February 2025. They have confirmed that 10% of the supply will be airdropped to mPoints holders.

    How to get a potential MilkyWay ($milkTIA, $MILK) token airdrop?

    Here’s how to get a potential MilkyWay ($milkTIA, $MILK) token airdrop:

    Time needed: 5 minutes

    1. Set up Cosmos, Kepler or Leap Wallet

      You will need a Cosmos, Kepler or Leap Wallet to participate in the MilkyWay airdrop, so get one of these wallets if you have not already.

    2. Connect to MilkyWay

      Connect your wallet to https://app.milkyway.zone/. Make sure you have the correct website or you risk losing your funds!

    3. Stake TIA

      Select how much TIA you wish to stake and click “Stake”. Don’t stake all your TIA because you need some of it for gas fees. It only costs around 7 cents per transaction!

    4. Earn milkTIA tokens

      You will get milkTIA rewards in return for staking TIA. milkTIA is MilkyWay’s liquid staking token and these rewards automatically compound.

    5. Check rewards

      You can see your milkTIA rewards in your wallet. If you are using Kepler wallet, you can also see your rewards in your Kepler dashboard.

    6. Hold your milkTIA tokens!

      There is nothing that needs to be done afterwards other than to hold your milkTIA tokens. Many are predicting that holding more milkTIA tokens may mean you will get more MILK tokens. And when MILK tokens are listed on major exchanges such as Bybit or Binance you would be able to trade these tokens, potentially earning huge profits.

    7. Provide liquidity to Osmosis

      Connect your wallet to https://app.osmosis.zone/pool/1335. Click “Create a position” and choose between Managed or Manual strategies to provide liquidity for others who will be entering or exiting the pool. Select the amount of milkTIA and TIA tokens you will provide and click “Add liquidity”.

    8. Provide liquidity to Quasar

      Go to the milkTIA/TIA Dynamic S+ vault. Connect your Keplr, Cosmostation, Leap or WalletConnect wallet. Finally, choose the amount of TIA and milkTIA tokens you wish to deposit and click “Deposit”.

    9. Optional: Withdraw milkTIA

      You have the option to withdraw your milkTIA tokens in exchange for TIA. To do this, click on the “Withdraw” tab, select the amount of milkTIA you wish to withdraw and click “Request Withdrawal”. Note that if you are willing to wait around 21-24 days for the withdraw to process, you will not need to pay any withdrawal fee. The risk however is that you forget about it.

      Otherwise, you can choose to withdraw immediately by swapping your milkTIA for TIA tokens. However, you will need to pay withdrawal fees in OSMO. So, make sure you have enough OSMO on Osmosis Chain for this. However, we do not recommend swapping out our milkTIA tokens as this may reduce or disqualify you from a potential MilkyWay airdrop.

    10. Go to https://testnet.drop.money/stake?denom=uinit and stake Initia ($INIT) tokens from Initia Testnet to get deINIT.

    11. Complete Zealy quests

      Connect your wallet to the Milky Way Zone Zealy Questboard. Complete the quests which include joining their social media accounts and interacting with their posts.

    BONUS: How to earn additional milkTIA rewards

    These steps are not necessary for the MilkyWay ($milkTIA, $MILK) token airdrop. But it could potentially help you earn additional yields on your milkTIA. Here’s 3 ways to earn additional milkTIA rewards.

    Provide liquidity to Osmosis

    1. Connect your wallet to https://app.osmosis.zone/pool/1335
    2. Click “Create a position” and choose between Managed or Manual strategies to provide liquidity for others who will be entering or exiting the pool. Note however that the manual strategy allows you to adjust the liquidity range, but it will require a lot of hands-on management.
    3. Select the amount of milkTIA and TIA tokens, then click “Add liquidity”.

    Provide liquidity to Quasar

    1. Go to the milkTIA/TIA Dynamic S+ vault at https://app.quasar.fi/vault/milktia-tia-dynamic-s
    2. Connect your Keplr, Cosmostation, Leap or WalletConnect wallet.
    3. Choose the amount of TIA and milkTIA tokens you wish to deposit and click “Deposit”.

    Deposit and lend on Demex

    Demex is a protocol in the MilkyWay ecosystem. By completing these tasks, you will be positioning yourself for both the MilkyWay and Demex $DMX token airdrop. This task is URGENT because there is a lending cap of 750,000 milkTIA. So, you need to hurry! Here’s how to position yourself for the MilkyWay and Demex airdrops:

    1. Sign up for Demex and get 5% bonus HERE
    2. On Demex, go to “Fee Settings” and de-select the option to use milkTIA to pay for fees.
    3. Optional: To prioritise paying fees using Demex’s native $SWTH token (which we find is cheaper), go to Osmosis to swap some $SWTH. Afterwards you will need to swap your $SWTH from the Osmosis to the Carbon chain. To do this, go to https://ibc.fun/ and select Osmosis and OSMO in the “From” section, and Carbon and SWTH in “To” section. Then, you will be able to see your $SWTH balance in your Demex account balance.
    4. Go to https://ibc.fun/ and transfer your milkTIA from the Osmosis chain to the Carbon chain.
    5. Go to https://app.dem.exchange/nitron, scroll down and click “lend” on the milkTIA lending pool.
    6. Select the amount of milkTIA you wish to lend and click “Lend”.

    MilkyWay airdrop review

    When reviewing an airdrop, there are several factors to consider. First, the likelihood the project will even do an airdrop in the first place. Then, to look at how many tokens the project intends to allocate towards airdrop campaigns, as well as the difficulty in participating in their airdrop. It is also important to look at the utility of the token so that there will be an actual use and purpose in participating in the airdrop in the first place. Finally, a factor to consider when reviewing an airdrop is whether the airdropped tokens are subject to any lockup period.

    Likelihood of airdrop: The MilkyWay airdrop is now live, and a screenshot has not been taken yet.

    Airdropped token allocation: The MilkyWay airdrop allocation is unknown.

    Airdrop difficulty: The MilkyWay airdrop requires participants to stake TIA on the protocol, which is not difficult. There are additional optional tasks to earn additional milkTIA rewards that require users to provide liquidity, which is slightly more complex.

    Token utility: The milkTIA token can be used for various DeFi activities on MilkyWay. Meanwhile, $MILK token holders will receive a portion of the protocol fees and entitles them to participate in the governance of the MilkyWay protocol.

    Token lockup: There is no information on the MilkyWay token lockup yet.

  • Somnia ($STT) token airdrop guide

    Somnia ($STT) token airdrop guide

    Somnia ($STT) is an EVM Layer 1 blockchain that processes 400k+ transactions per second with sub-second finality for mass-consumer applications. Their testnet is currently live and this may lead to a future potential airdrop! Here is our Somnia ($STT) token airdrop guide.

    Check out our step by step guide!

    What is Somnia ($STT)?

    Somnia is an EVM-compatible Layer 1 blockchain designed for high performance and scalability. It can process over 1 million transactions per second with sub-second finality and sub-cent fees. Key features of Somnia include:

    • Multistream Consensus and IceDB: Enables high throughput and low latency.
    • EVM Compatibility: Allows use of existing Ethereum tools and code.
    • Reactive Primitives: Supports real-time, fully on-chain applications.
    • Mass Consumer Applications: Suitable for gaming, social media, metaverses, and DeFi.

    How to get the Somnia token ($STT) airdrop?

    Time needed: 5 minutes

    Here is a guide on how to get the potential Somnia token ($STT) airdrop

    1. Connect to Somnia

      Connect your wallet to http://testnet.somnia.network

    2. Add Somnia testnet network

      Click “Add network” to add the Somnia testnet network to your wallet.

    3. Get testnet Somnia tokens ($STT)

      Click “Request tokens” to get testnet Somnia tokens ($STT). Note this may take a few minutes and you may need to try a few times before the send is successful.

    4. Send tokens

      Click “Send tokens” to send your testnet Somnia tokens ($STT) to either your friends or the Somnia team. This is to help Somnia test the network.

    5. Join Somnia’s Discord channel and obtain role

      Join the Somnia Discord channel, get verified by completing the captcha and explore the introduction channels when prompted. Go to the “choose your role” channel to get your role.

    6. Follow Somnia on social media

      Follow Somnia on Twitter to be updated on any new testnet tasks or campaigns.

  • 0G Labs token airdrop guide

    0G Labs token airdrop guide

    0G Labs is developing a decentralized AI operating system with a scalable blockchain, modular storage, and flexible serving framework designed to bring novel use cases on-chain. They are likely going to do an airdrop and it does not cost any money to participate! Here is our 0G Labs token airdrop guide.

    Check out our step by step guide!

    What is 0G Labs?

    0G Labs is developing a decentralized AI operating system (deAIOS) designed to bring novel use cases on-chain. Its main features include a scalable blockchain, modular storage, and a flexible serving framework for AI applications. The deAIOS has four key components: the 0G Chain, a fast and modular blockchain; the 0G Storage Network, optimized for massive data loads; the 0G Compute Network, a versatile framework for AI compute; and the 0G DA, an infinitely scalable data availability layer.

    They have raised a total of US$325 million so far with notable backers such as Animoca Brands, Hack VC, Alchemy, OKX Ventures, Delphi Ventures, among others.

    How to get the 0G Labs token airdrop?

    Time needed: 10 minutes

    Here is a guide on how to get the potential 0G Labs token airdrop

    1. Claim testnet 0G Labs token

      To claim the testnet 0G Labs token, go to https://faucet.0g.ai/ and enter your wallet address. You will receive 0.1 testnet $A0GI tokens.

    2. Upload file to storage.

      Connect your wallet to https://storagescan-newton.0g.ai/ and approve the connection to the 0g chain testnet. Go to the “Tool” section and upload a file, it can be any file you want.

    3. Send testnet $A0GI tokens

      Send yourself some testnet $A0GI tokens.

    4. Join Discord and claim OG role

      Go to https://discord.com/invite/0glabs and join their Discord. Note the server may be full so you may need to try again later. Once you are on their Discord, Go to the “general” channel and claim your OG role by adding “OG” to your Twitter name. Then, go to the “sync” channel and type “/Verify” and your Twitter and Telegram usernames without the “@”.

    5. Follow Twitter

      Follow 0G Labs on Twitter at https://x.com/0G_labs to stay updated on the latest news.

  • Botanix Labs token airdrop guide

    Botanix Labs token airdrop guide

    Botanix Labs is developing a Layer 2 protocol called Spiderchain, which introduces a decentralized Proof-of-Stake layer to Bitcoin, enabling native yield from decentralized applications without altering Bitcoin Core. They have recently launched its final testnet which means they may do a potential token airdrop in the near future. Here is our Botanix Labs token airdrop guide.

    Check out our step by step guide!

    What is Botanix Labs?

    Botanix Labs is developing a Layer 2 protocol called Spiderchain, which introduces a decentralized Proof-of-Stake layer to Bitcoin, enabling native yield from decentralized applications without altering Bitcoin Core. Its main features include:

    1. Spiderchain: A Layer 2 protocol built on Bitcoin, enabling decentralized applications without changes to Bitcoin Core.
    2. Proof-of-Stake Layer: Adds a Proof-of-Stake layer to Bitcoin, unlocking native yield from decentralized applications.
    3. Decentralized Multisigs: Secures funds moved from the Bitcoin base layer through decentralized multisigs.
    4. Forward Security: Protects user funds by removing attack vectors that threaten traditional rollups and centralized multisig designs.
    5. Verifiable Randomness: Uses Bitcoin block hashes as a random number generator for the Spiderchain.
    6. Fair Launch: Inherits Bitcoin’s decentralization and fair launch characteristics.

    Investors in Botanix Labs include Utxo Management, Polychain, Edessa, and Valor Equity Partners. The company has raised a total of $11.5 million across two seed funding rounds.

    How to get the Botanix Labs token airdrop?

    Time needed: 50 minutes

    Here is how to get the potential Botanix Labs token airdrop

    1. Add Botanix testnet to Metamask

      Go to https://chainlist.org/chain/3636 and connect your wallet. Then add Botanix testnet to Metamask. Approve the transaction.

    2. Sign in to Botanix Labs

      Go to https://bridge.botanixlabs.dev/ and sign in with your wallet.

    3. Request testnet tokens

      Go to https://faucet.mutinynet.com/ and first log into your Github account. Once you are signed in you will be redirected back to thr testnet page. Select 100k sats and copy and paste your deposit address (starting with tb1…) from the Botanix Labs dashboard. Then, click “Make it rain”.

    4. Register transaction ID

      Click “View on mempool” to see the progress of your transaction and copy your transaction ID by clicking the small clipboard icon. Paste you transaction ID back on the Botanix bridge site and click “Register”.

    5. Claim deposit

      Click “Claim deposit” on the Botanix bridge site to claim your deposit.

    6. Swap tokens

      Go to https://bitzy-testnet.vercel.app/swap and connect your wallet. Swap some of your testnet BTC to USDT.

    7. Stake tokens

      Connect your wallet to https://circuit.palladiumlabs.org/ and click “Get Mock WBTC”. You should then see a pop up and hit the “Confirm” button. Once the transaction is completed, let’s go ahead to mint PUSD.

    8. Mint PUSD

      Head to the “Mint PUSD” section and deposit WBTC collatral to mint PUSD.

    9. Interact with Spindle

      Connect to https://dev.app.spindlefinance.xyz/.

    10. Mint testnet tokens on Spindle

      Head to the “Mint” section and mint testnet USDC and testnest WBTC.

    11. Lend and borrow

       Go to “Lend” and lend the maximum amount of USDC. You will need to approve the transaction first before lending. After you have successfully lended, go to the “Borrow” section where we can then borrow against our USDC.

    12. Stake tokens on Rover

      Connect your wallet to https://testnet.roverstaking.com/. Get testnet BTC and stake the tokens to get rovBTC. Make sure you do not stake more than what you have.

    13. Explore Rover ecosystem

      Click on “Ecosystem” and interact with the various ecosystem projects.

    14. Complete Galxe and Zealy quests

      Go to https://app.galxe.com/quest/botanixlabs and https://zealy.io/cw/botanix to complete the quests on the respective platforms.

  • Drop ($DROP) token airdrop guide: How to earn Droplets

    Drop ($DROP) token airdrop guide: How to earn Droplets

    Drop ($DROP) is a liquid staking protocol designed for Interchain assets. It’s also a proud member of the Lido Alliance, which focuses on enhancing liquidity and interoperability across different blockchains. Drop is awarding points known as Droplets to early users that help build the protocol’s ecosystem. According to their FAQs, Droplet holders will become eligible for the future DROP airdrop. Here is our Drop ($DROP) airdrop guide.

    Check out our step by step guide!

    Drop Money Airdrop: How to Farm Droplets Program | $DROP Overview

    See our full guide HERE.

    What is Drop ($DROP)?

    Drop ($DROP) is a liquid staking protocol for Interchain assets, backed by Lido. Here are some of its main features:

    • Liquid Staking: Drop allows users to stake assets and receive liquid tokens (dAssets) in return, which can be traded or used in other DeFi protocols. Currently, Drop supports liquid staking on Neutron ($NTRN) and Atom ($ATOM), with Celestia ($TIA) coming soon.
    • Security: Drop ensures the security of staked assets through rigorous validator selection and monitoring.
    • Droplets Program: Users can earn Droplets, which are valuable and can be stacked, by participating in the Drop ecosystem.
    • Interchain Support: Drop supports multiple tokens and operates across different blockchain networks, enhancing its versatility.

    Drop has recently secured US$4 million in seed funding led by Coinfund and including Mustafa Al-Bassam, Co-Founder of Celestia. With only 12,000 users and US$20 million deployed, Drop is relatively underfarmed yet could have huge potential.

    How to get the Drop ($DROP) token airdrop?

    Here’s a guide on how to earn Droplets for the potential Drop ($DROP) token airdrop

    1. Get wallet

      Prepare Your Wallet You’ll need either a Kepler or Leap wallet to interact with the Drop platform.

    2. Get Atom and Celestia tokens

      Ensure your wallet is set up and properly funded with Atom ($ATOM) and Celestia ($TIA) tokens. 

    3. Get invited to Drop platform

      Access the Drop Platform. Note that Drop is currently invite-only. Use our invite link HERE

    4. Participate in Phase 1 before 12th February 2025

      Ensure you are actively liquid staking before Phase 1 ends on 12th February 2025. 10% of the total drop token supply will be reserved for Phase 1 participants.

    5. Liquid stake

      To liquid stake your $ATOM or $TIA tokens Within the Drop app, stake your Atom ($ATOM) or Celestia ($TIA) tokens. This process will convert your Atom into $dATOM and Celestia into $dTIA, and you will start earning droplets. 

    6. Monitor Droplets earnings

      To monitor your progress of earning Droplets, visit https://droplets.drop.money/. Each dollar worth of DATOM will generate one droplet per day. These droplets will potentially be converted into an airdrop of Drop ($DROP) tokens at the end of the campaign.

    7. Explore other airdrop opportunities

      Holding dAssets like DATOM may qualify you for other project airdrops, such as the one from https://nfa.zone/

    8. Take advantage of Droplet multipliers

      Providing liquidity on specific pools on Drops’ partner programs may allow you to earn multipliers on Droplets. For example, you can take advantage of the Droplet multipliers available on Astroport, Apolllo or Levana. We have found that many people opt for Levana because it was the first choice. However, we opted for the Astroport dATOM/ATOM pool because it gives 50x multiplier with no impermeant loss. A full list of the Droplet multipliers and the requirements can be found HERE.

    9. Use staked tokens for DeFi activities

      Use your staked tokens (ie $dATOM and $dTia) across various DeFi protocols. This includes deposits, collateral for perpetuals, trading, and more. This will increase your activity points and your share of the airdrop.

    10. Refer friends

      Share your referral links to earn extra droplets. This can significantly boost your standing and potential airdrop earnings.

    11. Take advantage of OG Badges

      If you participated in Phase 1, you will receive exclusive perks and multipliers in Phase 2 through OG badges. Multipliers in particular can enhance your earnings further.

    12. Stay tuned for phase 2

      Phase 2 begins immediately after the end of Phase 1 on 12th February 2025. Keep an eye out for new d assets and staking opportunities.

    13. Stay tuned for the token generation event (TGE)

      TGE is likely to occur after Phase 2. Stay updated by following their social media accounts.

  • KGeN ($KGen) token airdrop guide

    KGeN ($KGen) token airdrop guide

    KGeN ($KGen) is a gaming platform backed by Aptos that leverages Zero-Knowledge Machine Learning to build gamer reputations and create engaged gaming communities. They have a K-Drop campaign where you can earn K-Points for a potential future airdrop. Best of all, you only need around 10 minutes to farm this potential airdrop! Here is our KGeN ($KGen) token airdrop guide.

    Check out our step by step guide!

    KGEN Airdrop: How to Farm Free Testnet Airdrop (BACKED BY APTOS!) Step by Step Full Tutorial Guide

    What is KGeN ($KGen)?

    KGeN ($KGen) is a next-generation gaming platform backed by Aptos. It leverages Zero-Knowledge Machine Learning to build gamer reputations and create engaged gaming communities. KGeN’s ($KGen) main features include:

    1. Gamer Reputation Engine: Builds and verifies gamer profiles, offering publishers targeted insights to tailor experiences and build loyalty.
    2. E-commerce Marketplace: Converts gamer reputation into tangible value, enabling players to unlock exclusive rewards and providing publishers access to pre-qualified, engaged leads.
    3. Proof of Gamer (P.O.G.) Engine: Validates gamer engagement and activity to reward and empower players and developers.
    4. Multi-Chain Ecosystem: Unites gamers and developers across the globe, simplifying web3 onboarding for web2 publishers.
    5. K-Quests and Rewards: Offers various quests and campaigns where players can earn rewards and redeem them through the KGeN wallet.

    How to get the KGeN ($KGen) token airdrop?

    Time needed: 10 minutes

    This is a guide on how to get the potential KGeN ($KGen) token airdrop

    1. Sign in

      Go to https://play.kgn.live/pog and sign in using your Google, Whatsapp, Twitter or Discord accounts.

    2. Create Avatar

      Click “Start minting” and choose your username. Then choose a category and image for your avatar. Afterwards you can choose to capture your selfie for your avatar. However you can skip this step if you wish. Finally, click “Mint” to mint your avatar. Note this may take around 100 seconds to complete.

    3. Share profile

      You can share your profile on social media to get extra K-Points.

    4. Validate tasks

      Go to your dashboard by clicking “My POG” at the top of the page. Validate any tasks you have already completed.

    5. Complete tasks

      Complete other tasks and validate them in order to earn more K-Points. Tasks include connecting your social media accounts, and following KGeN’s official accounts.

    6. Complete K-Quests

      Go to the K-Quest page and complete as many quests as you can. To complete the quests, simply click into the quest and then “Start K-Quest”. Download and install the game. Then, submit your email and Twitter handle, and earn from playtesting the game.

    7. Participate in Clan Chief Program

      The KGeN Clan Chief Program allows gamers to lead their own gaming communities. As a Clan Chief, you can recruit members, organise gaming events, and help your clan members complete challenges and quests.