Staking on Ethereum 2.0 is finally live. However, the process of connecting your Ethereum (ETH) coins can be a bit tricky. It’s not all about sending 32 ETH to the contract. Doing so would end up with you losing your funds. In this tutorial, we will cover how to connect to the ETH staking contract through a validator node. Furthermore, we shall be using Allnodes, a non-custodial platform for hosting nodes.
How To Set up an ETH 2.0 Validator?
First, your Ethereum wallet should have the 32 ETH coins needed by the contract. Note that interacting with the Ethereum blockchain is done through MetaMask. Therefore, you need to fund your MetaMask through a hardware or a software wallet.

The journey starts on Allnodes. The platform takes care of the technical bit of hosting nodes for a relatively low fee, although it depends on the hosting package chosen. The platform supports multiple payment methods, including Bitcoin and other cryptocurrencies.
Click on Ethereum staking on the upper right corner, and on the new window that opens, select “Host ETH 2.0.”
If you’re new to Allnodes, create an account; otherwise, login to your account.
Select you’re your plan.
Connect to MetaMask.
ETH 2.0 Launchpad
Click on “Open ETH 2.0 Launchpad” then “Get started.”

There are subsections on the left pane of the welcome screen, such as introducing eth2 phase 0, signing up, and responsibilities, among others. In addition, it holds information on the expected income. On the responsibilities section, for example, it states that a validator node only earns rewards when it’s actively participating in the network. Unfortunately, the effects of a node being offline are equal to the profits of it being online.
Other critical sections:
- Risks of slashing – If a node gets compromised or it misbehaves, its stake is slashed, consequently reducing its staking power.
- Backup Mnemonic – They are special words that are used for recovering deposited ETH. For maximum security, the mnemonic should be written on paper instead of saving on a computer.
- Transfer delay – For now, interacting with the deposit address is one way. As such, you can only deposit and not withdraw or transfer the coins.
- Long term committed – Ethereum has a commitment statement noting that validator nodes are in it for the long haul and they can’t go back to previous versions such as ETH 1.0.
On the client selection pane, there’s the option to run ETH 1.0 client. While this is possible, it’s costly and needs some technical knowledge.
Generating Key Phrases for ETH 2.0
The next window is for generating key pairs. First, select the number of ETH 2.0 validator nodes you need. Note that each node requires depositing 32 ETH into the Ethereum staking contract.
Next, select between Linux, Windows, and Mac operating systems.
For this example, we’ll be setting up an ETH 2.0 validator node on a Windows-powered computer.
The intimidating part about this part is that it uses a command-line interface (CLI) instead of a graphical user interface (GUI), which is what non-devs are used to.
Downloading and Using CLI
Download the CLI from Github by clicking on the link “get it from developers.” When on the download page, select the release that coincides with your computer’s operating system.
Extract the zipped folder to reveal the file called “Deposits.”
The “Deposits” file is a CLI interface.
To get it to run as required, hold the SHIFT key and right-click on the file to bring up the option “Open PowerShell window here.”
On the previous download page, below the list of available downloads, copy the command code and paste it on the open CLI window. Note that this window should have a blue background color.

Follow the instructions on the screen for the command to run successfully.
Choose language and select a password. PLEASE remember this password; we shall need it later.
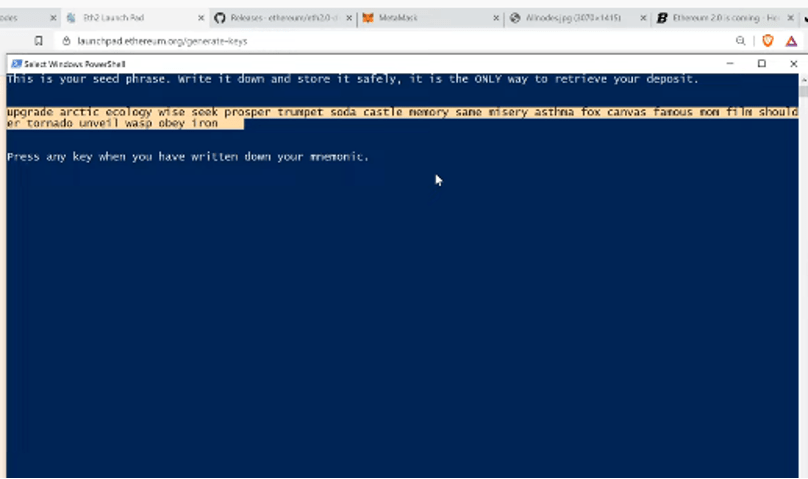
The CLI will generate a unique mnemonic. The mnemonic helps you unlock your staked ETH when transfers finally go live. Therefore, put it on paper for safety and press “Enter.” Input the phrase.
In the folder with your CLI download, a new folder named “validator keys” will be created. Inside this folder, we have two files; Deposit data and Key store.
Depositing The Files on Launchpad
On the “Upload Deposit File” section, hit “add file” and drag and drop the deposit data file (Deposit.in).

Click “Continue” and connect to your MetaMask wallet, which should have 32 ETH.
Read the summary, “Initiate the transaction,” and double-check the Ethereum deposit address.
Confirm the transaction on MetaMask. You can view the transaction status on Etherscan after it’s successful.
Back To Allnodes
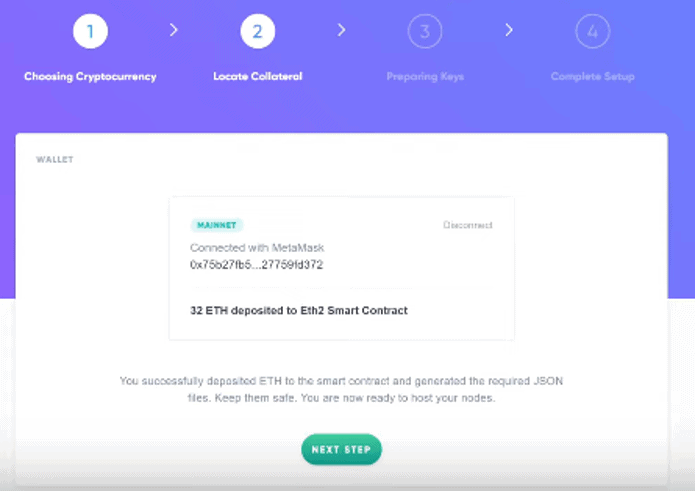
Let’s pick up from where we left on Allnodes. Confirm that you’ve generated ETH 2.0 phrases, deposit data, and have put in 32 ETH to the contract.

The next step is to choose the hosting plan.
Drag the files in the specified order. That is, the deposit data file, key store file, and provide the password we generated earlier on the CLI interface.
The next window on Allnodes shows the status of your node.
Note that you can use Allnodes to run multiple ETH 2.0 validator nodes.
And, that’s it.
Note that you can view the status of the deposit on the Beacon Chain by using the same address that you used to deposit your coins to the ETH 2.0 staking contract.
Manage your Allnodes account
To keep up ETH 2.0 node, you need to top up the node which requires a payment of around US$5 per month until the release of ETH 2.0. ETH 2.0 is expected to be launched in around 2 years. In return, at every epoch you would be able to earn a bit of ETH in return.
Update: Returns on my Allnodes node?
As of June 2022, my validator node balance is at 35.45202. This means I have earned a total of around 3.45 ETH since I set it up 2 years ago in 2020. Note that results may vary and those who set up their node earlier (as was in my case) were able to enjoy a 16% APY.
Conclusion
Ethereum 2.0 is being continuously developed by the Ethereum Foundation to be able to run on a wide range of computing devices. The above tutorial on how to set up an ETH 2.0 validator node using Allnodes covers every corner of the process. However, critical details such as mnemonics and passwords should be kept secure since they determine access to the deposited coins.
In addition, it’s worth noting that the process happens on three platforms, Allnodes, ETH 2.0 Launchpad, and CLI. Therefore, the three systems must harmoniously work together to get the desired outcome.
FAQs:
Good question. First, NO. a validator node needs the full amount.
However, you can still stake a lower amount only that it will be through third parties such as participating cryptocurrency exchanges such as Binance and Coinbase.
NO, not until ETH 2.0 reaches Phase 1, which is likely to be in 1 year or possibly more.
Disclaimer: Cryptocurrency trading involves significant risks and may result in the loss of your capital. You should carefully consider whether trading cryptocurrencies is right for you in light of your financial condition and ability to bear financial risks. Cryptocurrency prices are highly volatile and can fluctuate widely in a short period of time. As such, trading cryptocurrencies may not be suitable for everyone. Additionally, storing cryptocurrencies on a centralized exchange carries inherent risks, including the potential for loss due to hacking, exchange collapse, or other security breaches. We strongly advise that you seek independent professional advice before engaging in any cryptocurrency trading activities and carefully consider the security measures in place when choosing or storing your cryptocurrencies on a cryptocurrency exchange.


Hi, thank you so much for the article. Just few questions… Can you explain the role of password in the process? I guess it won’t be needed for withdrawal. So does it only encrypt the validator keys? And if so, can I leave the validator keys in the cloud without fear, because it cannot be used without password? Also, if the validator keys can be generated from the seed, I guess there is no need to store them or the password? Thank you.
Can you do one on a Macbook?
unfortuantely you need the macbook to be online 24h without any interruption. So it’s possible but not practical.